Thursday 26 May 2022

Spring Cleaning the CPC Keyboard

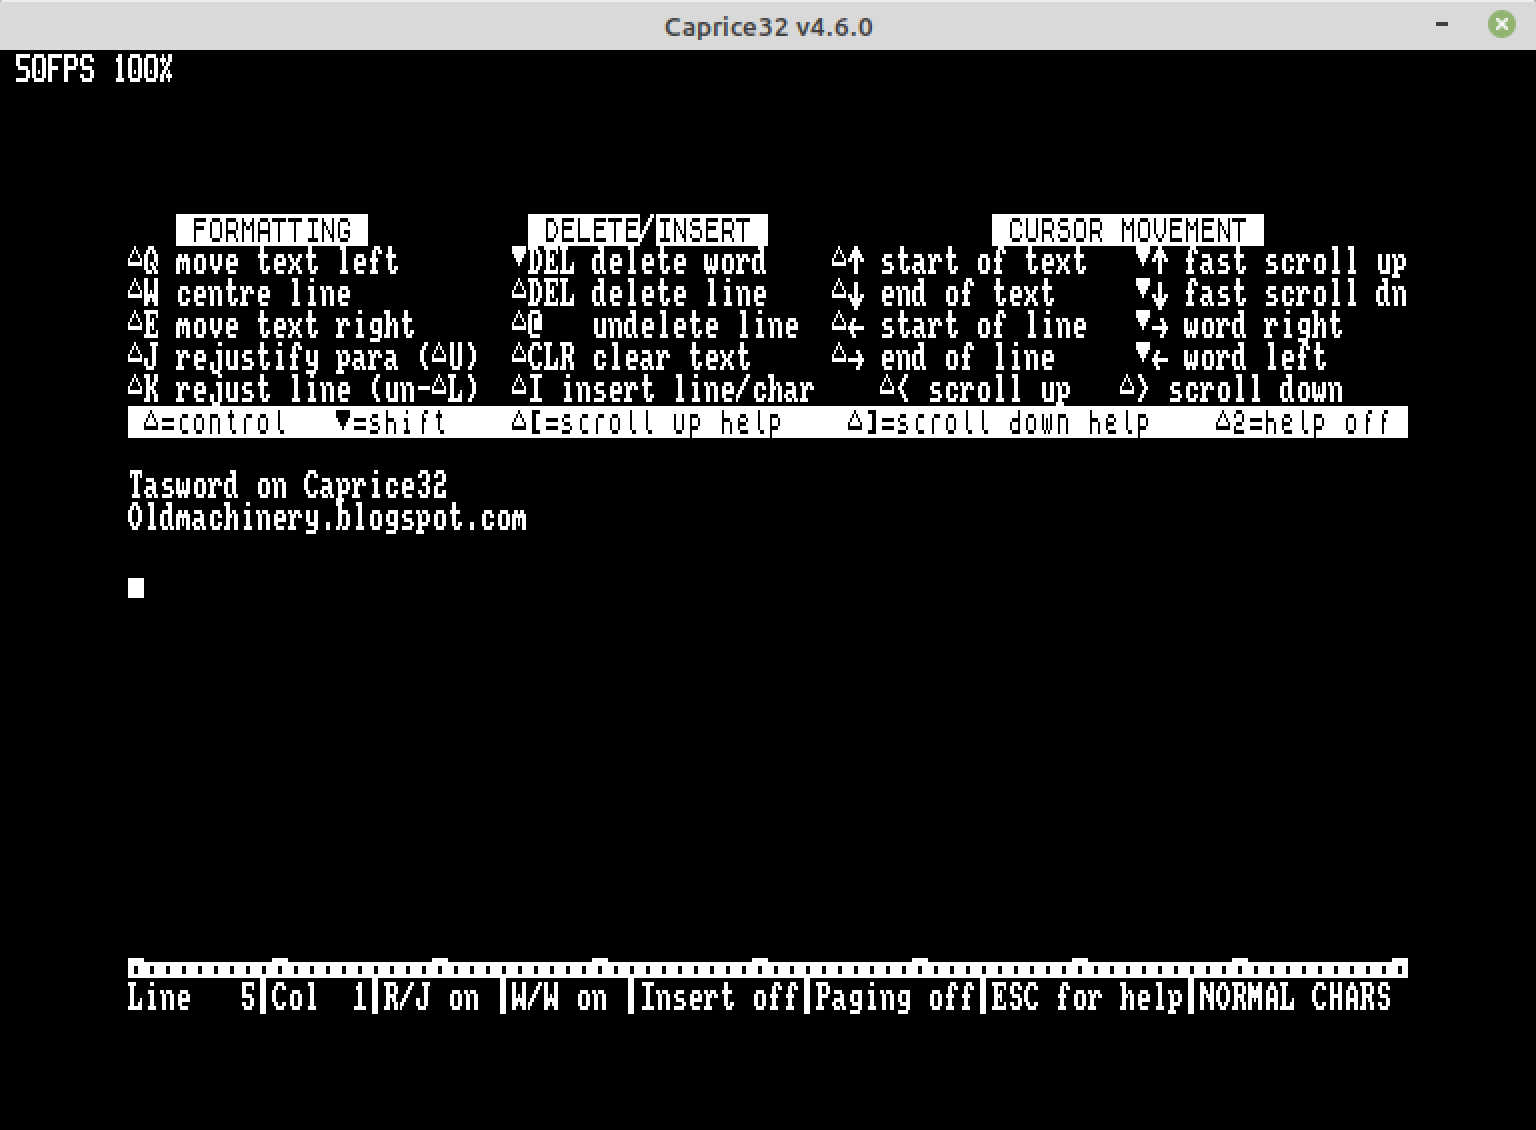
Again, written on Amstrad, mistakes and all:

After experimenting with writing on Amstrad and the Tasword, I felt something could be done to the keyboard. It's not that the keys didn't work, but they tended to get stuck.

As a remedy, I decided to open the keyboard, have a look inside and clean anything that might look suspicious. Old keyboards do need some care.

On removing the keyboard module, I realised how much more impressive this is than the Sinclair membrane system. The membrane is hidden inside a very protected environment, where very little or no dust can interfere.

After carefully peeling the keyboard layer from the metal base, the parts become revealed. On top of the metal base there is the membrane, and on top of that lies the black plastic frame for holding the keys.

At this point, there is almost nothing to do, as the insides of the keyboard module are surprisingly clean. Just a light dusting off is enough. Then I can get into removing the keys.

Each of the key has two or maximum of two "hooks" which have to be carefully pressed inwards to make the key fall off. Fortunately my fingernails are of the correct length here, I could remove the keys rather easily.


I left the more difficult looking wide keys last, as they also have a tiny metal rod to balance the keypress. These keys I removed one at a time, cleaned them and their surroundings, and put them back immediately. This way I wouldn't get confused with parts.

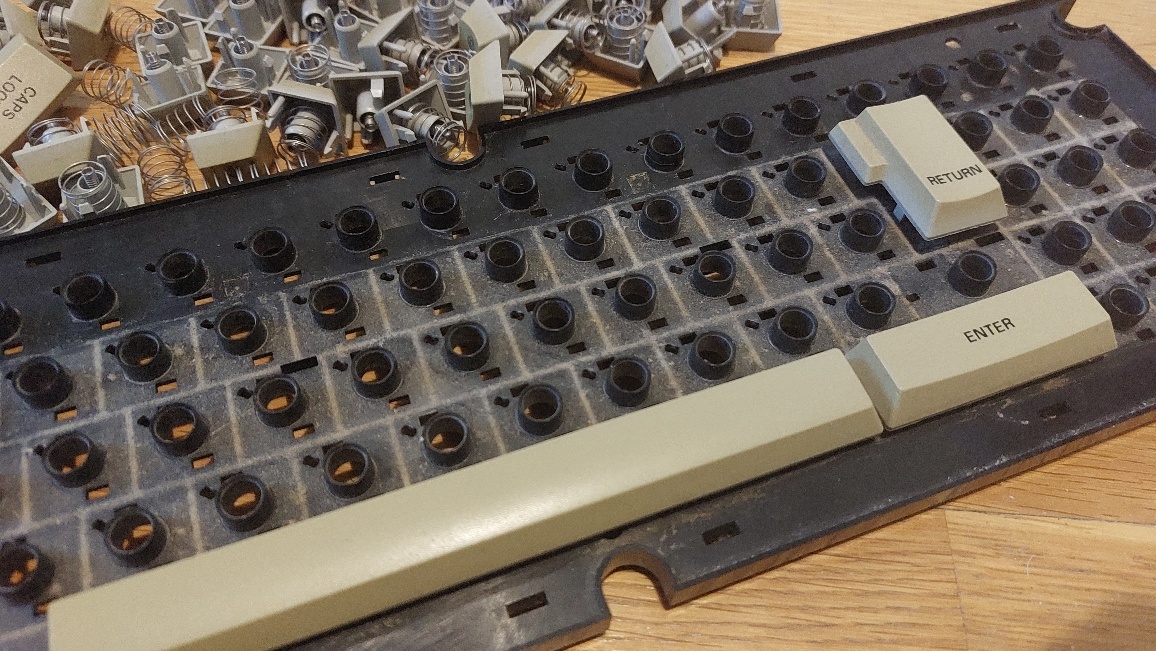
With the Return keys I noticed one of the "hooks" were missing. However I am almost certain I did not break it myself. Putting it back together the key felt ok, it doesn't really need both of them.

Then began the tedious process of cleaning each of the keys and generally fiddling about. I didn't have a master plan here, I felt it ought to be enough if I clean everything with somewhat moist Q-tips. Although with them I have to take care not to leave the tiny pieces of fabric the Q-tips tend to leave.

Just to feel I'd done something I strecthed the large spings a little before putting them back into place. Experimentally I also filed the keyboard holes a little in the hope this would prevent them getting less stuck.

Then everything is put back together, everything's fine? Not really at first. To my horror, a single key, the key F did not function at all. There were also some problem with space key producing two spaces more often than one!

Having a single key non-functioning meant the problem was not in the matrix, as this would result in a cluster of non-functional keys. So I pushed the key with some more force, and I heard a not very reassuring "SNAP". Fortunately this was the snapping together of the final hook between the plastic case and the metal plate. For some reason I had neglected to check if they are really properly all together.

I also gave the keyboard a sort of bash-around, bit like a guitarist does to strings after changing them. This seemed to help a little and the nuisances were mostly behind. I still feel something is off with the space bar, but at least it doesn't double-space anymore.

As a test I wrote the above text and this paragraph with the Tasword. Although not everything is perfect and I have not yet become used to the keyboard, it's already better for typing and I can perhaps dare say it could be better than a Sinclair QL keyboard after all.

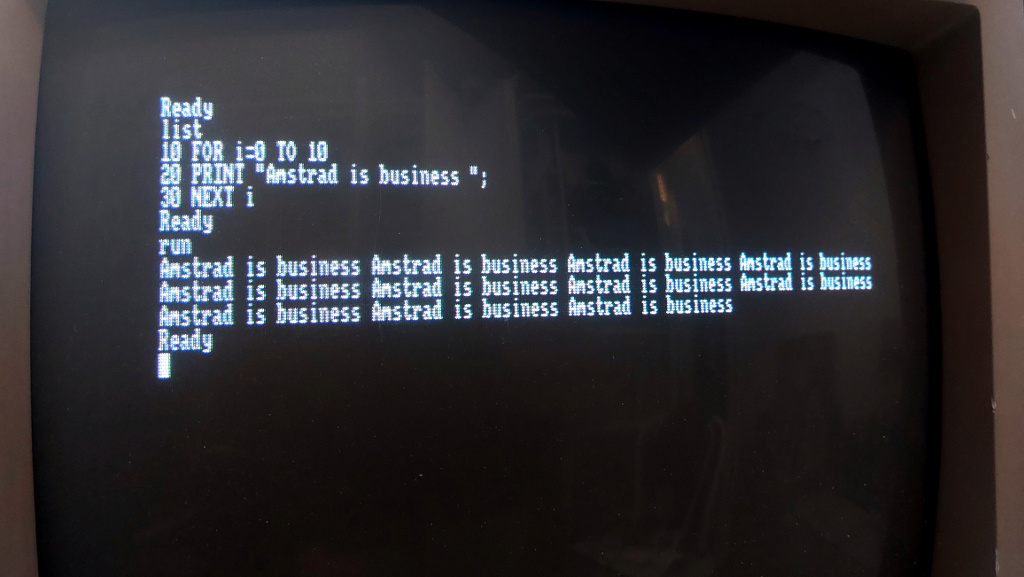
I felt more encouraged to do this now that I got my HxC floppy emulator write problems resolved. The writes simply failed before I disconnected the internal floppy drive entirely. So, now I don't have to resort to photographing the screen but instead had to find a way to get the file to the Linux enviroment, a much more interesting task.

End of part written on Amstrad.


Back to Normality


I was so eager to transmit the above text to Linux, I did not check it and so there are a few typos.

The photograph below shows the plastic hook of the return key was already broken before I removed the key. Left from the center and a little down. Nice!

After some more typing I felt I could still open the keyboard one more time and improve some individual keys. At least the keys no longer become stuck in normal typing.

Getting the file back to Linux was easier than I thought. The HxCFloppyEmulator GUI version helped me convert the .hfe file into an Amstrad .dsk image.

Possibly because the image had not originated from iDSK, that program did not recognize it. Luckily I already had compiled the alternative sector-cpc. This did the job:

./sector-cpc --file blogpost.dsk extract post2.txt

This digs out the file post2.txt from the blogpost.dsk image file and saves it on the Linux filesystem.

Looking at the text there were some idiosyncrasies. Although I had written everything as paragraphs, pressing return only at the end, the file had 0x0D and 0x0A (Carriage Return and Line Feed) after every visible "line":


The spaces that Tasword had visually inserted to help center the columns are actually included as characters! For this one case, I manually formatted the paragraphs and used find-replace to destroy the double and triple spaces, before copy-pasting the results to Blogger.

The image above also shows the garbage at the end of the text proper, partly a leftover of earlier editing. Whether this was something the sector-cpc produced when exporting the file, I'm not sure.

These issues can probably be adjusted in the Tasword settings, should I continue with my 8-bit writing career in the future. Alternatively I could write a program or script for tidying the text files.

Sunday 22 May 2022

Blog post written with Tasword on Amstrad CPC6128

The text below was written using an Amstrad. Sadly, my HxC floppy emulator refused write operations so I couldn't save the text. Instead I photographed the text from the screen and retyped it all here, without changing anything so all the silliness and possible mistakes are present.

(Later note: Got the HxC write working by disconnecting the CPC internal drive.)


Blog post written with Tasword on Amstrad CPC6128

As soon as I learned that I could use the 80-column wide graphics mode on Amstrad CPC6128 and the 1084 monitor, I wanted to try out text editing on it. The first program I could find was Tasword, and it looked promising enough.

Tasword was a familiar name for me from the Spectrum days. Then it had a reputation with cramming 64 columns on the 256 pixels wide display. And being an overall comprehensive enough editor.

Here with Amstrad CPC6128, I guess the program is the same old, except it doesn't have to resort to gimmicks in order to display 80 columns of text. The 640 pixels wide mode 2 is perfectly capable of showing it all.

In fact, the experience is rather similar to using a text editor on an Amiga or Atari ST. The major difference is the obvious lack of mouse.

Typing text diretly into paragraphs is quick enough. The keyboard has seen better days, but I am not so sure if this is better than the Sinclair QL. The cursor keys are well positioned here, one of the first home computers to get it right I guess.

Writing text between existing paragraphs appears to be fine at first, but when the cursor reaches the edge it will start overtyping the paragraph below. Turning Insert on helps here, the problem was just that the Tasword does not have it on by default. Furthermore, you will have to turn on Auto-Insert to get the behaviour you'd expect nowadays. This is pretty slow! Creating new lines between already existing text is predictably slow, but not horrendous.

I have written this post mostly from top to bottom, without stopping too much to think what I ought to write. If I had to start editing the already existing text, it might result in problems, as I don't know what keys and what functions I am supposed to use.

The above paragraph was moved from above to a more suitable position. This was achieved using the Block Mark, Block End and Block Move commands. Then I had to use Delete Line and Insert Line to tidy up the space between the paragraphs. These are typical functions of old word processors, and I'm no longer under the illusion this is a more modern editor.

As the program is 6128-specific, where I think this shows is the program is occasionally using a RAM disk of sorts. There is more than 60K available for text, surely this would be enough for a school essay or a chapter in a novel.

All in all, not a bad experience, but if I was writing a longer text or something with more thought required, I would be missing the mouse movement and quicker copy and paste. Then again, this kind of old software could encourage planning the text in some other way. Possibly I'd outline and sketch it on paper first and then just clean up the manuscript on the Amstrad.

I did not look into other text editors, I guess the Amstrad scene might have produced slicker applications at a later day. I didn't really look into the matter, but perhaps another time!


Saturday 21 May 2022

Amstrad Odyssey

This Amstrad CPC6128 has been with me for many years. I didn't have an Amstrad CPC in the 1980s, I don't think I ever even saw one back then. But certainly I felt the presence of the brand in many advertisements and magazine articles. 

As Amstrad bought Sinclair, I have had somewhat mixed feelings towards a company that both rescued the Sinclair line but perhaps didn't do as much as could have been done to move it forward.

As a later entry to the 8-bit game, the CPC and especially the 6128 tried to improve the earlier home computers:

  • A decent keyboard with cursor keys at the right place
  • Variety of graphic modes for both utility and games
  • Flexible BASIC with graphics and sound commands
  • Disk drive as standard
  • Good display options

The 6128 is perhaps one of the more better thought out 128K 8-bitters, not suffering from the Frankenstein nature of Spectrum 128 and Commodore 128. The Finnish Mikrobitti magazine even declared the Amstrad 6128 as a computer of the year as late as January 1987.

However, the market was drying out that point so there were not that many models to compare it with. It's even debatable if the CPC6128 is a better deal than the Commodore 64 from 1982!

Yet I can imagine that with the 640-wide resolution and the disk drive, text editing could be rather nice. The specs also helped it run the ageing CP/M.

Anyway, around this time it started to look like a dead end to the whole 8-bit generation. The Z80 processor was struggling to move around all those graphics, and the memory had to be banked. And even if they had put in even more memory, the contents would have to be loaded. Slowly.

Faster Z80 processors and better storage devices might have extended the lifespan of these machines, much like with the eastern bloc Spectrum clones. But at this point Europeans had switched their attention to the increasingly affordable Atari ST and Amiga models.

The Amstrad video chip has been proven to be quite capable, at least for various demoscene tricks, but without sprites the games couldn't hope to be very fast.

Compared to Spectrum and C64, it has been somewhat painful to get software up and running on a real machine!

There are a couple of good Amstrad emulators around.

The CPCBox even works online:

http://retroshowcase.gr/cpcbox-master/index.html

Here's a list of emulators:

https://www.cpcwiki.eu/index.php/Emulators#JavaScript_.2F_HTML5

Arnold is a name that comes up, but for some reason I've used Caprice locally. Possibly it was the first I got running on my Linux and did what was needed, that is I can feed in an automatic Amstrad command line when running the emulator from the Linux command line. For example:

cap32 mydisk.dsk -a 'run "picture.bin'

...would attach the mydisk.dsk image and feed in the basic command to run the file picture.bin.


The Real Amstrad

This one has been modded to output the 5V regulated power to an external HxC Floppy Emulator. However, it would need the 12V in to the floppy cable dangling out.

The computer itself takes 5V, the plug is core negative, pin positive.

The dangling floppy cable has 12V core positive, pin negative.

I've sometimes taken the 5V for the HxC from an Arduino. This worked when using the HxC device for QL. But I somewhat fear the Arduino isn't able to provide the suggested 400mA minimum for running HxC with a card.

If there's no display, pressing the CLR key should give a beep from the internal speaker. If there's no sound then possibly there's something with the Amstrad or at least the keyboard... or the speaker. Remember to turn the volume up.

I had some problems with some of the keys working. I saw nothing wrong with the membrane keyboard connectors, just shuffled them around a bit and reconnected them. Fortunately this helped and my keyboard worked again. Possibly the connector had come loose at some previous time when I had opened and closed the case for some other reason.

As with Sinclair computers, the video mode is always a bitmap, meaning that text and graphics can be combined in BASIC easily. But it also means there are no fast character modes.

A mono-display composite video cable is easy enough to make by using the Luminance and Ground pins from the Amstrad monitor connector. This should be enough for testing if the Amstrad and the keyboard works more fully. The RGB cable is more complex and obviously requires an RGB-compatible display.


1-R
2-G
3-B
4-Sync
5-Ground --- connect
6-Luminance --- connect

And wham, it doesn't play games or demos that well but at least the CPC can be tested:

When in BASIC, the command CAT gives the Catalogue (i.e. Directory) of the floppy.

RUN is used for loading files, e.g. if there's a file called PICTURE.BIN in the catalogue, use RUN"PICTURE to run and execute the program.

A fun thing out of the luma video cable is that the 80-column mode 2 becomes usable (via MODE 2 of course) and it's not at all bad on my 1084S display. Hopefully I have some time to play with it in the future.


Multipaint and Amstrad

With my very own Multipaint, it's possible to export Amstrad graphics images in mode 0 or mode 1, and get them running on a real computer. However, there are a few steps needed to make this happen.

  • The output binary file from Multipaint, easy enough
  • iDSK program is needed to dump the file to an Amstrad disk image
  • With HxC floppy emulator, the dsk image has to be converted to HFE
With Multipaint, you have to export the file as an Amstrad .bin, not as Multipaint .bin. Confusing! I could have chosen a better file extension for the Multipaint project files.

The iDSK can be found from for example here:

http://koaks.amstrad.free.fr/amstrad/projets/

The given archive can be extracted with

tar -xvf iDSK.0.13-src.tgz

Use make in the folder, this gives warnings but should result with the functioning binary at the src folder. It of course makes sense to move the binary to usr/local/bin/ for example.

(I edited away the mention I was not previously lucky in compiling the iDSK source.)

23.5.2022 note: sector-cpc looks like a good alternative to iDSK.

With Caprice running, I could use the following bash script to both generate a new disk image, enter the chosen file to the disk image and run Caprice with that. This was helpful for testing the image display code for various modes without having to cycle through past commands again.

#!/bin/bash
#
# showimage filename
# (without extension)
#

iDSK mydisk.dsk -n

iDSK mydisk.dsk -i $1.bin -t 1 -e 6000 -c 6000

~/amstrad/caprice32/./cap32 mydisk.dsk -a 'run "'$1'.bin'

(Supposing the caprice emulator is located in that folder.)


That's enough to get the exported file working in an Amstrad emulator, but what about the real computer?

I have a Lotharek's version of the HxC Floppy Emulator to run programs from an SD card. This also presupposes the cable is correct for the CPC. 

The HxC jumpers need to be set, and the array of jumpers may be positioned differently in other versions of the HxC. 


Looking from back at the Lotharek HxC, the two rightmost pins at the top are connected, here marked with x:

...x
...x
....

Different HxC models might have the pin array in different orientation. 

Sadly I don't know how the Amstrad has been modded, apparently the internal drive is disabled so the HxC can act as drive A, because that's how it works currently.

The disk images need to be converted to the HFE format used by the floppy emulator.

Again, the converter needs to be compiled. Marq discusses it here (in Finnish) http://www.kameli.net/marq/?p=1240

When all is finally in place, the converter can be run from the command line:

hxcfloppyemulator_convert pics.dsk -HFE

After this has been done, the hfe file can be copied onto the SD card. The HxC can mount the image and the disk can be accessed from Amstrad BASIC with the CAT and RUN commands mentioned above.

Edit: I did try that text editing thing.