Saturday, 15 September 2018

Pizza Box C64


I became curious about what would be the best way to put the Commodore 64 inside a pizza box shape, to save a bit of table room and to have some fun.


Board orientations

Common sense says the circuit board should be tucked away at the backside of the box, but I wanted to explore other logical possibilities too, and bloat the blog post for what is essentially a very simple case project.


1. Board at front, backside to front

The cartridge port and devices would be very accessible, but the front would look messy. I'd have to take a lot of care to make the openings neat and still it would likely look quite bad.

Joysticks and power would be quite accessible at left side. Different connectors and the cables would  eat up table space which is not very desirable.


2. Board at front, backside inwards

Clean front, but the cartridge port would be hidden and unaccessible. Joysticks and power would be highly accessible at right side, near the computer front. Not that bad really, if I am sure I rarely remove the cart. Perhaps the cart buttons could be wired to the side or front.

In a situation like this the SD2IEC could be pulled to the front panel.


3. Board at back, backside inwards

Seems clean all round, but the wires would have to come out somewhere, most likely the back, which would somewhat defeat the purpose of this position.

Pulling some of the cables & connectors to the front would be neat & easy. The cables could compromise the creative uses for the empty space, though.

Again, the cartridge would be quite unaccessible.

4. Board at back, backside outwards

Like the normal Commodore 64 setup, the joysticks and power are at the right. Unlike the C64 they are quite far away from the computer front.

This is perhaps the most preferable orientation, cables are tucked away at the back like they should be, and the cartridge can be accessed even if a bit far away.


Sideways

I also considered some sideways orientations, although I did not expect them to be useful they are in fact not all that bad:


5. Right side, backside inwards

Again, less accessible cartridge port, joystick ports would be awkward at the back. The cables could be pulled out from the backside, which is a plus of this position. 

Also, there would be nothing at the front of the computer, perhaps SD2IEC access.

6. Right side, backside out

Would give the joysticks and power to the front, and extra access to the cart. The cables would fall out from the side which would take room on the table. Depending on the position on the table this would not be that bad, but the power cord and joystick obviously are a bit bluntly at the front.


7. Left side, backside out

The same problems as with 6, but almost none of the advantages. Cables would pour out from the side and yet the cartridge and joysticks would be quite far.

8. Left side, backside in

How about no? Well, ok the cables can again be pulled out from the back but the power cord would come out from a fairly ridiculous point, something that was about bearable in 6.


So, the verdict is there's not that much to improve on the initial idea, represented by the orientation 4. But positions 2 and to some extent 6, did give some food for thought so it's not the only viable solution.

Although 4 gives the idea that the port configuration resembles the c64 mostly, actually 2 has the joystick/power positioning closer to the breadbox original in relation to the front side of the computer.

Did not explore: Upside down circuit board. Diagonal circuit board. Circuit board at the centre of the box (and all 4 variants)

I'm also not considering a tower now although I was a bit attracted by the upright position as inspired by Sinclair Janus(Pandora?)/Atari Microbox/Sony PlayStation2.


Going for size

By the way, what are real Pizza Box sizes? Google says 16" is for extra-large which translates to 40.64cm. This would be enough to house the 390 x 136 board.

I figured dimensions 410 x 350 x 50 would be a good starting point, it's the real C64 width, the monitor (1084) base depth, about the height of the C64C at the highest point.


The above image collects some of the initial ideas about how the box would be sized in relation to the monitor and the things inside. Top image is front and the bottom image is a sort of "section" from the side.

Based on this image I already found some reason to position the board a bit further away from the backside, the legs might get in way of the board.


Building the box

At first, I placed the circuit board over the bottom, to have an idea what of the real size. Then I drew the screw positions with a pencil, drilled the holes and put the board into place.


There are a couple of bolts on each screw so the circuit board doesn't touch the chipboard, and a few of the screws are capped with bolts so the board won't fall out if upside down.

The legs had so short screws I could not fasten them, I'm just hoping they stay put in the drill-holes.


Then I'm just adding the junk chip board all around, using wood glue although it won't have the proper effect as the boards are already painted.

The four-player adapter fits rather nicely here although I did not think about it at the beginning. The board is kept slightly inwards, not because of the rubber feet I was talking about previously. (The feet were much tinier than I remembered)


The SD2IEC is taken out of its previous cover. I would have rather ordered a new SD2IEC, but I was impatient so the cover will have to find later use.

There's a lot of room inside the box, which is one benefit of moving the computer to a larger case. I'm toying around with the idea of housing a Raspberry there, with no connection to the C64 whatsoever.

I'm not going to lie, the material looks awful ugly at the moment:


Some prettification is in order, but it'll have to wait until next time. This was already one session's worth of work for me.

The size ended up as 405 x 300 x 55, so all around slightly different than what I envisioned. It turns out the 1084S base is really less than 300, and not 350 at all. I could still use a less thick top get to the 50 height though. The SD2IEC went to the left side instead of right.

Oh, where's the keyboard? I have already an idea or two, but again, some other day. The SD2IEC interface and Final Cartridge menus can be operated with a joystick, so for the time being this is a limited C64 "game console".

-> Story continues here

Monday, 3 September 2018

Lenovo Thinkpad x220i


Some time ago, I switched over from Dell Latitude 4310 to a used Lenovo Thinkpad x220i.

The Dell charger started to give trouble, so I changed the charger and eventually that one gave trouble too. It turns out there's a signal transmitted from the charger, and if the computer does not find the signal it throttles the processor speed and prevents the battery from charging.

There's a grub fix that prevents the throttling from happening, but it doesn't help with the charging problem. The fix might even prevent the processor from boosting. I also found there is a hack around the one-wire protocol used in the charger, but it seems a bit beyond my time/equipment/skills to be honest.

In addition, one of the USB ports started to show contact problems so I was quite motivated to move on. The Dell was by no means a bad computer for a Linux Mint install, it served me for quite many years.

I had the opportunity to buy a comparable laptop for less than 100€.  Moving over to another, similarly specced laptop, now that some time has passed I felt it would be nice to try to list the tradeoffs:


Lenovo on the plus side:

-I could move the SSD directly to the drive bay of the Lenovo, the Linux Mint boots fine from it. To be honest I might not have bothered installing yet another Mint and building my environment.

-I had 2 x 4GB laptop memory lying around that did not work properly on the Dell, these work on the Lenovo, a very nice bonus!

-The graphics hardware is somewhat better than with the Dell, it can be noticed for example in webGL applications. This doesn't make it a gaming lappy by any means, but at least web banner ads don't slow it down :O

-It's lighter and has smaller dimensions than the Dell. (I count the smaller screen a plus in this case)

-The Lenovo (probably) does not have that silly vendor locked charger thingy

-One more USB, and a USB port that supplies power even when the laptop is off.

-Slightly better/louder audio from the laptop speakers.

-A tiny detail, but like the positioning of the SD card reader better. It's on the right side, almost as if it were a floppy drive.

-Displayport


Lenovo glitches/downgrades:

-The processor (Intel® Core™ i3-2310M CPU @ 2.10GHz) is a tiny bit less capable.

-No webcam. In theory one could be fitted I suppose.

-Although apparently SATA3, the SDD demonstrated only SATA2 speeds so no improvement on that. This might not be the computer's fault, though.

-No CD/DVD drive. Not often used anyway, and an external drive works just as well so I'm not sure how big a "minus" this really is, it's dead weight most of the time.

-The keyboard is maybe not quite as good, it travels a bit more and is more susceptible to small particles. After a few months I've become used to it though.

-Something worries me about the touchpad. The scroll function ceases to work at times, although only at specific Chromium tabs! I've not yet got to the bottom of this, but it only came up after the laptop change so I'm listing it here.


*

So, all in all a quite good exchange. The pluses are quite noticeable, whereas many of the negatives are not such a big deal or can be worked around. The Lenovo runs the same Linux Mint 18 Sarah 64-bit install as before. Both have VGA, RJ45 ethernet, SD card reader and headphone jack.

Wednesday, 1 August 2018

Multipaint 2018

This year there has been no Multipaint release, so it was about time.

(Edit 16.9.2019: Multipaint 2019 is more recent.)

Get the new Multipaint from here.

Still, it's more of an intermediary version, and not nearly all to-do's and good suggestions have been addressed. But here's some:

Finally fixed the silly mac version bug where the icon graphics could not be fully loaded. I simply integrated the icon graphics with the source so nothing needs to be loaded at all here. Entirely different privacy/quarantine/malware scan etc. issues might still pose problems depending on your setup.

Left: old pepto, Right: colodore

Alternative palette support for C64 modes (loads .act format). The one true C64 palette for PCs is a bit flexible concept, so I've finally caved in to requests and allowed alternate palettes. That old pepto might still be most favourable for C64 pics on the PC screen but it might not always be the best prediction for how the image will appear on other hardware. So better prepare with alternate palette checks!

You can for example download different colodore settings as .act files from pepto's colodore site and then load them into Multipaint with the standard load icon. It would be nice to support some text editor readable palette formats (GIMP) but this was the easiest to do for now. The .act file contains 256 R,G,B byte values, but only the first 16 are loaded. A Hex editor can be used for fiddling with the values.

Note that using different palettes might produce complications when loading in png files, so better use as nearly the same palette as in the original png.

A preview window, if you can decipher it from that mess 
I added a sort of preview window (backspace on/off), another often requested feature. It's not a true floating window, and although I could have copied the solution from Marq's PETSCII editor, I am still a bit careful. This "window" can be dragged around the screen but unless in the magnify mode there's not that much room for it anywhere.

To help give more space for the preview window I made it possible to force multipaint window size in the prefs.txt, for example something closer to your native screen resolution. However this should be used with care as what works in one screenmode might not work in another.

More flexible window & icon arrangement is something I'm working towards in the future.

Not too useful yet, but at least the preview doesn't HAVE to overlap the pic
Mousewheel support has been long coming, and I finally bothered to find out how to circumvent that "ambiguous type" error message that had prevented me from using it. Hey, I'm no Java expert... I also added some customizable functions for the wheel in the prefs.txt, but these are very preliminary. The wheel defaults to magnify in and magnify out.

More undo levels, there are now 20. All memory for undo steps is reserved at the start, so I have been wary at adding too many levels, however 10 was a bit silly for pixel work of this type. In the source version, it is easy to add even more.

I added a simple aspect ratio switch for MSX and future modes, as it's clear that although MSX has the same pixel resolution as the ZX Spectrum, it gives a flatter image (depending on NTSC/PAL whatever). The simple aspect ratio is only an approximation, and won't work with the preview window.

Also, Multipaint kind of supports 256 height now. The flat aspect might not be flat enough for QL!
For those who have bothered to read this far, I can say supersiikrit screen modes are now more accessible. These incomplete, untested or otherwise experimental modes were usually only accessible from the source version. But now the application allows these modes too, but only through the prefs.txt:

C64NOLIMIT (320 x 200 with 16 fixed colors, i.e. C64 hires without attribute limits)
QLLOW (Sinclair QL 256 x 256 with 8 fixed colors) *
AMIGA (Amiga OCS 320 x 200 x 32 colors out of 4096)
COCO3 (Tandy Coco 320 x 200 x 16 colors out of 256)
BK0010 (Elektronika BK0010 256 x 256 with 4 fixed colors) *
PICO8 (Pico8 fantasy console 128 x 128 with 16 fixed colors)

*) Uses the flat aspect ratio switch

No export/import functions, so only jpg/png works with these, and I have no guarantee on the accuracy of the modes or the suitability of the Multipaint toolset for these modes, especially when it comes to the "Amiga" mode.

Again, the new Multipaint, from here.

Tuesday, 24 July 2018

More 8-bit pictures

Again, I'll have a look at some of my recent 8-bit pictures.


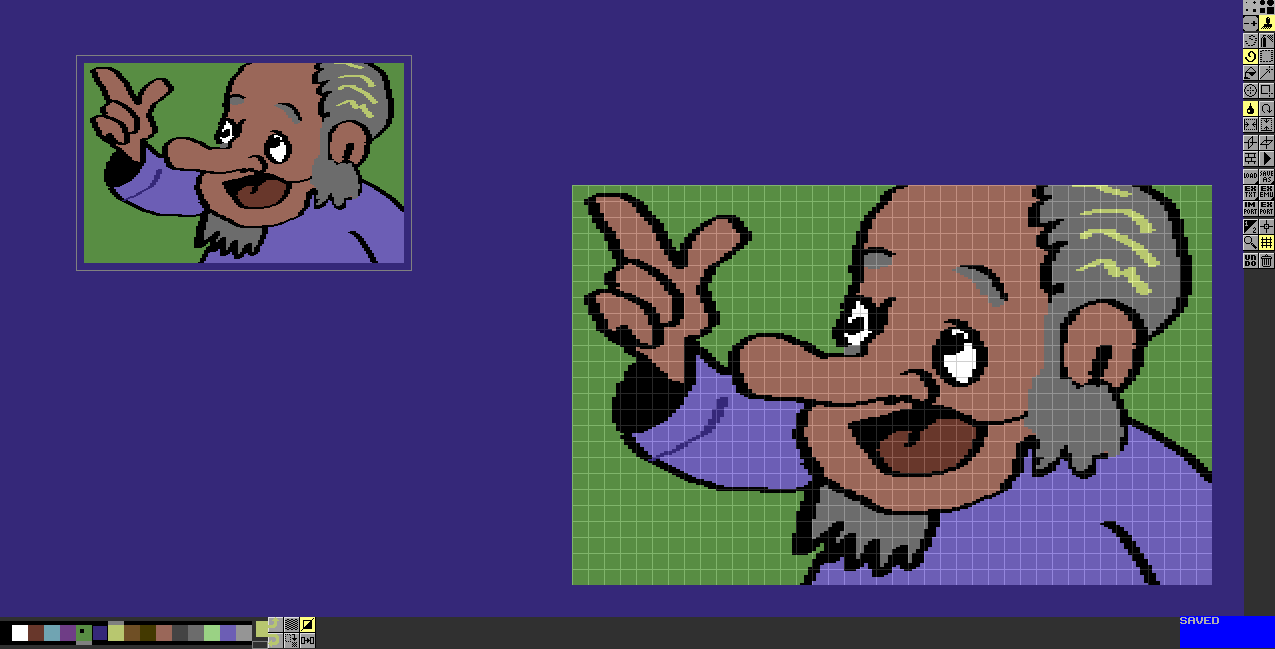
Queen, a multicolour Commodore 64 picture,for the Vammala Party scene compos. What started as an Alice in Wonderland-esque image, was finished quickly with fantasy chesspieces. Made with Multipaint.


Wolverine, a PETSCII work, also for Vammala Party. Fun to do and using the triangle chars for the costume was no-brainer, but maybe a more active pose would have been impressive. Made with Marq's PETSCII editor.


Remote, a, well, remote entry for Gubbdata 2018 graphics compo. Again, made with Multipaint. This turned out simple/nice and has a multicolour vibe to it even though it is a Commodore 64 hires.

Cartoon outlines are not that easy to do on hires and the approach falters at places, but I feel I managed to make it look like it's intentional.

The image started out from trying to recreate a C64 picture I saw in a dream (roll eyes here if you want to) but the end result became something very different. The robot is reminiscent of the robot in Short Circuit, which I watched recently.


Friday, 6 July 2018

Atari 2600jr


Just think that many Atari 2600 games are now about 40 years old. I believe I encountered Atari 2600 in the summer of 1984. This Jr. version is a later acquisition, I got it alongside a bunch of computers in 2010s.

In the past I had already fixed the select/reset buttons (a common problem in Jr) with crude switches, but avoided doing the composite video mod. Except now.

As Ataris are so popular there are a gazillion mods. I followed the mod from a site that happens to be gone now, but it is pretty much same as here. I simply found my board to be similar and the instructions are very concrete.

1 x R 330
1 x R 1K
2 x R 2K2 (=2,2K)
1 x R 3K3 (=3,3K)
1 x Capacitor 100pF

The mod features a 100pF ("101") capacitor, I figured that the n10-labeled capacitors in my inventory should suffice, although I haven't seen this notation too often.

"n10" = 0,10nF = 100pF

(The 'n' denotes both the scale and the position of the comma so 1n0 would be 1,0nF and so on)

I added a tiny board where I imagined all the wires and resistors would go neatly, placing it over the pins that now make up the select/reset switch connectors. The plan fell through and I soldered the resistors directly to the chip as in the site I found. The added board was somewhat helpful for fitting the video cable that goes out of the box.

Without the audio, two solders away
I cut a couple of grooves to the right side of the case, so the video/audio cables can stick out from there. Having the grooves tight keeps the leads in place. A neater mod would have two proper connectors but I didn't have ones that would have fit. I left the RF connector as it is.

I realized I can't use my previous select/reset switches as they collide with my added board! Not much foresight here I have to admit. Also it reminds me how large the switch boxes can be.

So I removed the crappy switches and added two buttons to the top of the case. I could have removed my additions but I was lazy as usual. The new switches are connected with breadboard jumper cables at least they can be detached easily for removing the case.

I played a bunch of games installed into a Harmony cartridge. But is there something wrong with some of the colors, for example California Games has obviously a wrong palette? But games I know well such as Jungle Hunt and Space Invaders seem to have correct colors so likely it's a software version thing.


So, what to play? My own nostalgia-biased shortlist:

Jungle Hunt

A complete jungle adventure. Few corners have been cut in the conversion, but it does not detract much from the gameplay.

Space Invaders

Ok, so it gets monotonous and does not have all the subtleties of the arcade original, but this was my Space Invaders and the first game I played on the Atari 2600.

Berzerk

Ditto here, I kind of dig the chunky big graphics of 2600 conversions compared to the arcade stick figures. Switch on the Evil Otto for more difficulty.

H.E.R.O.


Even if the backgrounds are quite simple, the play appears to be as complete as in any version. Dynamite the walls, shoot the critters, always pick the route with the obstacle. Gets hard around cave 11 or so.

River Raid

The classic vertical shooting game is nearly fully featured as far as I see. Shoot the bridges, collect the fuel, shoot the fuel. Check the B-switch for proper missile behavior.

Ms. Pac-Man

Although the Pac-Man conversion has a bad reputation, the sequel delivers. A proper maze and you can even see everything.

Thrust

My best score so far.
This latter-day homebrew conversion by Thomas Jentzsch is amazing and possibly the best game altogether you can get for the Atari 2600. Considering it's one of the better games on the Commodore 64 it's surprising to see it fully functioning here!

Sunday, 17 June 2018

"Data East Hits" 8-bit Gaming My Arcade Pixel Classic mini console


Disclaimer: Your kid might in actual fact eventually become bored
Over the years I've seen a bunch of "50 games" type handhelds at supermarkets or department stores. As the games and physical design are always so bland and generic, I've avoided them.

Now I was lured in by a Data East-branded "308 games in one" cheap device that comes in various attractive shapes, notably the horizontal Lynx/Gameboy Advance form and the more obviously Game Boy shaped hand held console. There's also a mini arcade shape that I did not look at twice.

Options. Oh the buttons can be lit up too. Why?
I went for the Gameboy shape for novelty's sake, although to be honest the horizontal form might be better as a controller and for connecting the leads.

Ergonomics to hell, the case has been shaped with "pixel arty" corners, but this matters very little. Designers take note, perhaps this is an indication we've got past that roundening-era of design styling.

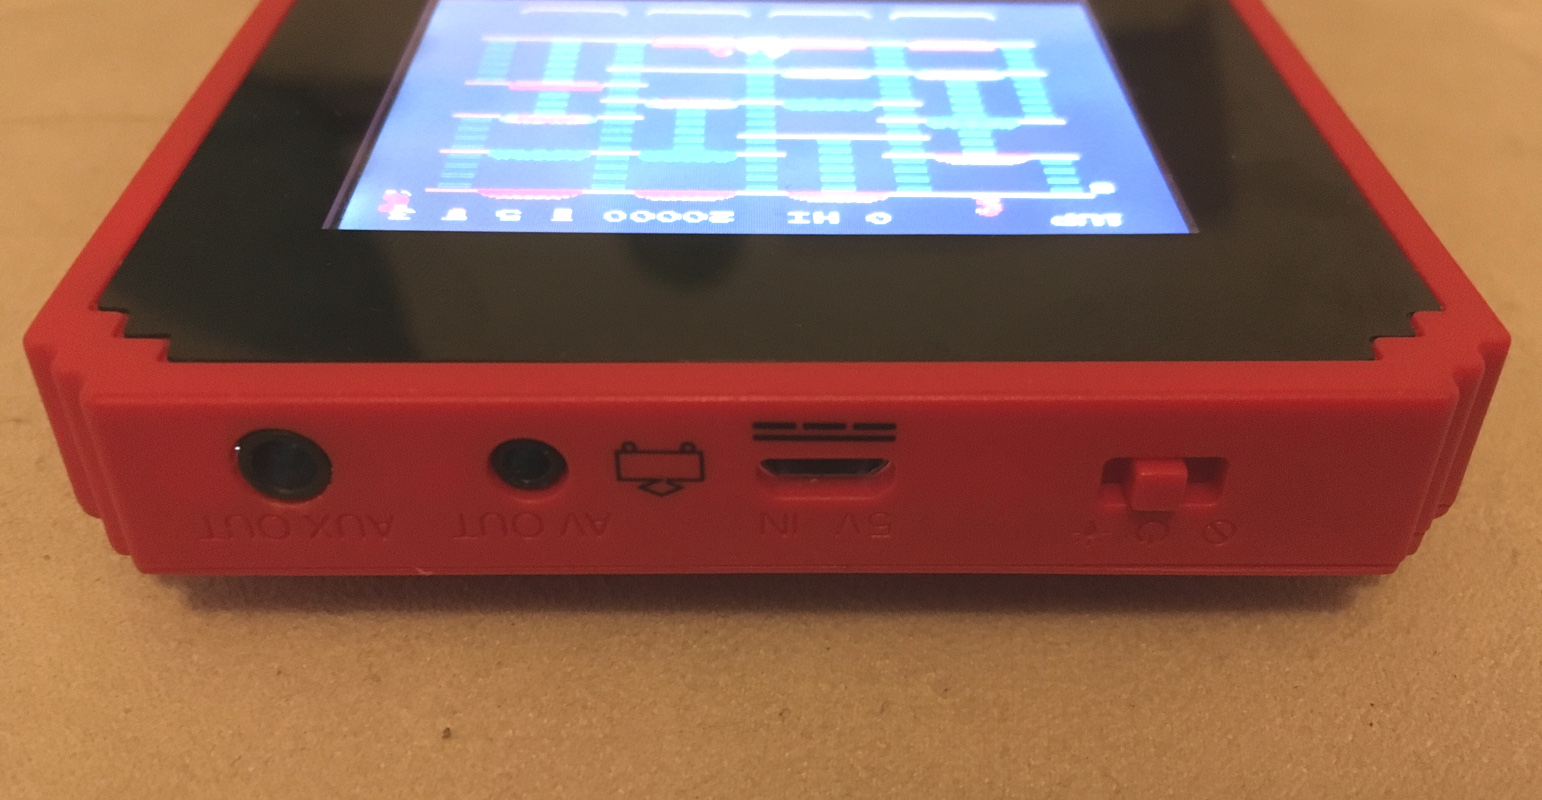
The plastic feels a bit flimsy, but the buttons give an adequate response. There's a 5V micro-USB style power connector, AUX out and AV out. The device works on 4 AAA batteries, but the other options sort of sold this to me, even though no cables or batteries were included with the price. (about 30€)


The game collection

The Data East name is boldly visible on the package, and as their back catalog boasts some really iconic stuff (Burger Time and Bad Dudes vs. Dragonninja) I was prepared to expect at least a good bunch of playable games.

I prefer Mr. Do's Castle (not included)
The word "arcade" might mislead you to think these are arcade version of the games, not to speak of the screenshots in the inlay card.

I can't believe that in this day and age I could still get duped by a "wrong platform screenshot". Thanks for making me feel like a child again, but perhaps not the way I expected...!

Screenshots may vary.
Yet the shots are made in a way that although built from arcade screens they might arguably represent "game covers" rather than actual gameplay, hence the logo overlays. And it DOES say on the cover, "8 Data East + 300 games", but that "plus" is also quite easy to miss. And it DOES say "8-bit" which should clue in that the games can't be arcade quality.

Let's make it clear: About 95% of the games are simplistic, NES bootlegs or otherwise very poor quality.

Real screenshot for comparison
On the first page we get Dragon Ninja, Break Thru, Caveman Ninja, Heavy Barrel, Side Pocket, B-Wings, Karate Champ, Burger Time... These are up to the quality of the NES versions of these games, which is to say they are not all that hot but mostly they play well enough.

But after the first couple of pages it goes downhill. So, enjoy the excitement of iconic 8-bit games the likes of Man in Red, Repair Urgently, Speed Man, Unusual Space, Girl, Tactful Monkey, Devildom Doom and so on!

There's pages and pages of this shift
Many of the games are old bootlegs and hacks of licensed games, like Dada is obviously Popeye, Primitive Woman is supposedly a Tom and Jerry game and Sunken Ship is worked from 2005's Titanic, which in turn is a hack of a Tom and Jerry again. Astro Robo To To is Astro Robo Sasa. Aether Kadass is Macross. Sky Invader is Sky Destroyer. These bootlegs can be semi-playable or interesting as such because the game content is kind of there. But I'm wondering how this particular collection of games got to be curated.

There are many scrolling vertical shooters, the best might be F22, with actual power ups, boss fights and varying levels. I guess it is another rework of something else.

The bootleg of a bootleg
I'm prepared to say some might even be filler crap made specifically for this device, varying a base source code to produce simple shooters and jump'n'runners.

Some games have visuals that go beyond NES, like Cut Fruit and Curly Monkey 2, but design-wise, there's not much thought on the gameplay or level design.

Some games are so simple it's harder to fault for what they are, like Horse Racing where you simply duck and jump with the horse. However there's a bunch of boring sprite-shoots-sprite stuff, guy jumping on platforms, or collects stuff falling from heaven, with slight variations and different skins. There's even a digital paper/rock/scissors game, which must be the pinnacle of sadness.

Dark Castle. Wasn't this Thunder Castle on the Intellivision? Looks crappier.
At least one track'n'field-type game has been blown up into a dozen, with javelin, long jump, hurdles etc., even making Breast Stroke and Butterfly Stroke into separate games. Although I have to admit it may be a better idea than try to endure a full decathlon. A panda takes the place of the sportsman, possibly a clue about the country of origin of these games.

Then there are card games and board games such as mah jong, reversi, checkers, sudoku and so on. These can't be overtly blamed if they are simply bootlegs of once commercial games. Sadly there's no chess, though. Other genres are absent too, there's no Tetris or Columns clone for example, and no proper top-down driving game with rotational controls either.

Dark square at right = Portuguese draughts? Your move.
Then there are doubles, that is the same game with different graphics. This is a bit irksome as usually both graphic variants are just as visually uninspiring.

Overall the games boast very mediocre, bland and unimaginative visuals and sounds, while the game titles convey an idea of non-IP-infringing nothingness. It's almost as if I'm witnessing a relic from an alternative universe Earth culture that had strangely failed to invent any of the central video game brands we have.

You go... eh, girl!
All in all, the Data East games are probably the most playable of the bunch and Burger Time might indeed be the best game on the entire device.

I'll review all the 308 games later.


Final verdict

I took the device to a composite video TV. As I don't have a proper 2,5mm AV cable I used a single tip/sleeve version which produced only a black and white image. Or is the output only B/W? This was enough to show that the device does produce a smooth frame rate for the TV, which is nice. Of course a few of the games give jerky scrolling or flickering sprites due to programming techniques.
A 5V 1A phone recharger cable seems to be sufficient for powering the device (no specs in the manual) so the absence of a cable in the package might be justified. However the 2.5mm TV cables are less often seen.

One annoying thing is the device can't remember the volume setting when returning to the menu. it can remember the menu positions so why it can't keep silent? Wading through the 308 game menu can be tiresome, even if it can be scrolled sideways too.

So, is the My Arcade 8-bit Gaming Pixel Classic any kind of value for money? Despite all the misguidance, I could still be generous and say there are about 30 reasonable quality games in it. Even then 1€ for each might still be a bit too much!

It's a bit sad considering the hardware might be capable of doing justice to the arcade versions of the games, but the conversion job would have been overbearing. I doubt the device is good enough to really emulate the suggested arcade platforms.

Perhaps if the game ROMs can somehow be rewritten, the device might be much more interesting because the physical hardware is OK-ish and the screen and sound quality is not that bad. I am a bit doubtful if anything inside can be easily upgraded, though. Missed potential I'd say.


Addendum 18.6.2018

As I saw the device might be easily opened, I had a peek inside:


For those interested in subduing the sound, this might be achieved by physically blocking the loudspeaker a bit more. (There are like 2 loud sound levels + silent)


The parts are not especially neatly connected so it was a bit of a bitch to put back together. So I'm probably not going to open it again.


The game ROMs are likely buried inside that alien tar shit thing. (Hmm the SPANSION S29GL256P10TF is memory, though). Putting the screen back, it has to be straightened by hand. Luckily it can be done after the board has been screwed back in.


Monday, 11 June 2018

Fixing a Fostex 280


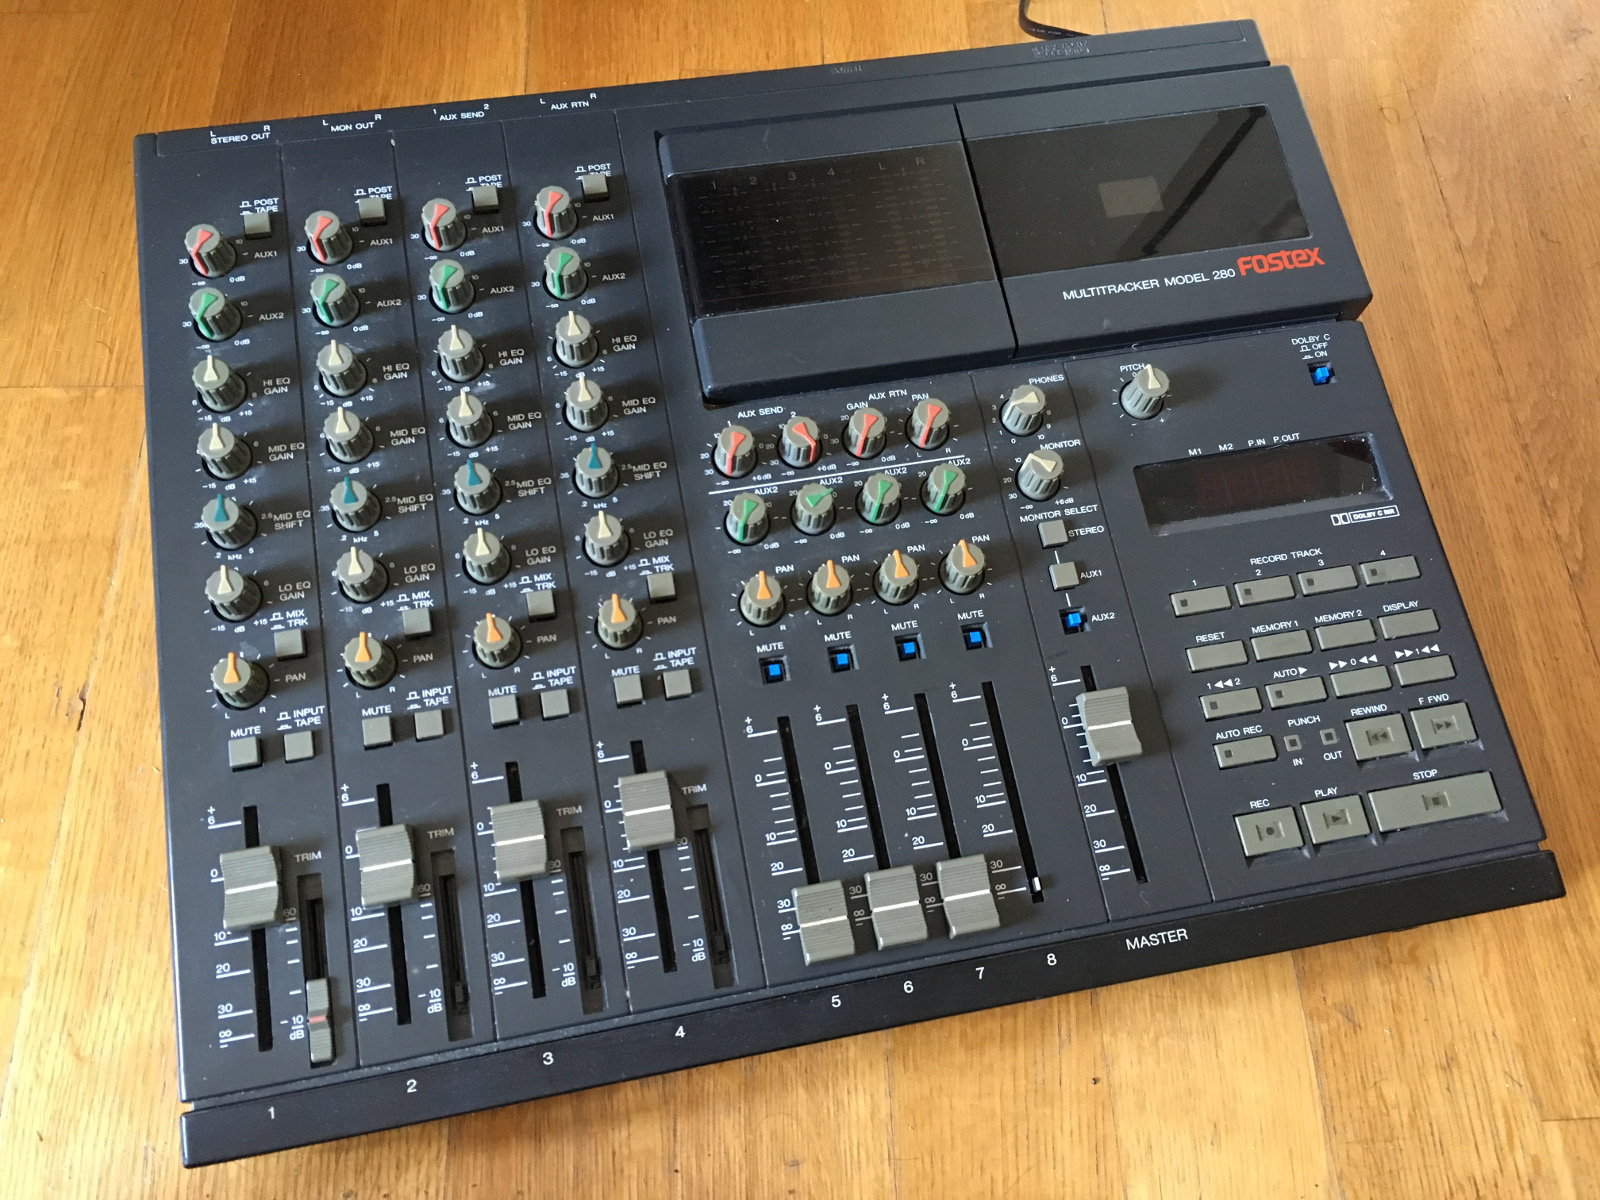
I have had a Fostex 280 (1989) 4-track tape recorder/mixer for about 20 years. I bought it used, around 1998, did some funny stuff with it but then generally forgot about it. At some point I considered it a junk item as the tape recorder had ceased working.

Now I found a 4-track tape with something I'd not heard in 20 years, which gave a motive to look at the device again. Searching the net I was pretty sure the tape recorder belt was faulty, which was also easy to confirm.

Also, I had probably misused the multitracker back in the day, so it might be interesting to record something with a bit better understanding of sound dynamics and a more appropriate cassette type.

The Fostex does 4-track on a C-sized cassette, simply creating four magnetic trails instead of two, using a higher speed than ordinary tapes. The mixer part has 4 main channels with equalization, gain, two AUX buses and various re-routing options. There are also 4 more channels with less options, giving a total of 8.

Channels can be recorded on one track, or stereo-recorded over two tracks at once. Tracks can also be bounced, re-recording for example three tracks onto one, giving more space for new tracks.

The digital control over the 4-tracker is pretty neat, as the tape counter can be set to zero at a convenient point,  and then >>0<< rewinds the tape back to that position. There's also one alternate memorized position that can be used as a loop end position, facilitating loop and auto-record.

Looking at eBay listings, a working Fostex 280, although not super-expensive, is not exactly trash either. Going back the memory lane, I remembered how fun and uncomplicated it was to do a recording without a computer.


Replacing the belt

As I saw the multitracker was not completely lost, becoming motivated again, I then ordered a replacement belt from eBay and received it in two days. Day later, I had it replaced.

When the belt has disintegrated, the tape deck can't really behave at all. As the Fostex is switched on, it will give a horrible creaking sound and an "E" on the display. Furthermore, the tape head may be left awkwardly in a position that makes it difficult to remove or insert the casing cover or even a cassette.

The dreaded "Red E of Death"
These are often indicators of a broken belt and replacing the belt got rid of these problems. Listening to my tape was bit of an anticlimax though, but nice experience in a time travel sort of way.

This video by the Youtuber account "3rd island" shows absolutely everything about the process. Without it I might have wasted time or even broken things. I'll recap the main points below:
  • Remove all faders, unscrew the case cover and then gently pull out the cover.
  • Disconnect cable connectors that might hinder the cover. There's no point in trying to keep the different units connected during repair, if they are in your way. The connectors are quite well color-coded and have logical sizes, but just to be sure you might want to photograph the starting position.
  • Pull out the circuit board with the faders. There's a foil between this and the circuit board below. The foil does not need to be fully removed, just disconnect all the connectors that lead to the tape unit, and make some note of their routes between the capacitors.
The white, red, blue and yellow are for the tape unit.
  • Remove the four screws that keep the tape unit in place. Take note of the ground wire that is also screwed in. Pull out the tape unit.
  • A metal panel needs to be removed before the belt can be inserted. This part is held to the unit with only one mechanical screw. Take care with removing the screw as this holds a couple of other parts in too, mainly the spring. Also, take at least a mental note of how the spring is held in place, before loosening any parts.
  • Now the belt can be positioned around the metal wheel. The other end may be stretched around the small black plastic protrusion next to the plastic wheel, which is the real target for the wheel. Also, make sure the plastic wheel and the metal wheel are clean.
The belt is temporarily stretched over the black plastic stick.
  • Putting the tape unit back together, make sure the spring is in correct position. After the screw is in, the belt can be moved from the temporary position to the actual wheel. As shown in the video, tweezers are good for moving the belt.
  • The ends of the spring need to be re-located, use a combination of a small screwdriver and tweezers to achieve this.
 Left: The hook for the top side of the spring end (not in place). Right: bottom spring end hook (in place)
  • Put it all back together, don't forget the grounded wire under one of the four screws and don't forget any of the connectors.

What makes this fairly simple is that the insides of the Fostex are quite modular and the tape unit is easy to remove.

As I went through the process I soldered back one of the headphone sockets which had come loose. To tell the truth there's a lot of other problems with this multitracker, such as a bit lazy/random rewinding and fast forwarding. Some of the channels have ceased working properly.

I'm wondering if some of these might relate to bad capacitors or similar issues. So, the recording experiments may have to wait for a while. But at least I got my sound out from the 4-track tapes which was enough for now.