Sunday, 29 October 2023

Keep on Eurotruckin' : Finland

Just to be clear. I'm not a very enthusiastic Eurotruck Simulator 2 player. But I have to admit for a while it's been fun to try to handle a truck instead of all the racing cars games usually have on offer.

As a typical Finn, I was mostly curious about how Finland is represented. For this I needed the Beyond the Baltic Sea DLC, and even then it only has southern Finland. You can visit for example Helsinki, Tampere, Turku, Pori, Kouvola and Kotka.

Being a simulation, you have to follow various laws, such as observing the speed limit, left-side/right-side traffic and whether lights need to be on in this country or not.

More technically, cruise control, windshield wiper, high beams and signaling adds complexity to the controls, although not everything really needs to be performed. Reversing a truck and a trailer can be really counterintuitive at times, which makes for a fun challenge.

Driving a truck does seem a stressful job, even in this simplified universe where you get to bump into things without repercussions, and no-one bothers your parking.


The Finnish experience

As the game mostly takes you from one industrial setup to another, you don't get to see that many sights in the cities. The portion of Helsinki on display does give a funny déjà vu, what with the local police cars, traffic signs and the green trams, but it's not a particularly accurate depiction.

I especially appreciate the first thing I see are areas under construction, because that's what Helsinki these days seems to be. Ha, ha. But it's really Jätkäsaari, under construction, an area that's been finished for a while.

Arriving in Helsinki West Harbor. Jätkäsaari is being built.

My first gig is from Helsinki to Turku, and although I don't know Turku, the Helsinki exit road from west is familiar terrain. Very vaguely I get the impression of leaving Helsinki over Lauttasaari, viewing perhaps Otaniemi coasts on the right, but I also have to say the scenery is a little weird there.

Arriving to Helsinki from the west, it looks more familiar. These should be Wärtsilä, Stora Enso, maybe even Cable Factory looming at the right side of the road.

Nearing the terminus of road 51.

The skyline is lacking the smokestacks. I guess most of the buildings are created from generic elements, and there's probably not that much unique geometry in the Finnish cities.

Then, at the left, it must be the Orthodox cemetery at Lapinniemi viewed from Porkkalankatu.

Porkkalankatu

What follows must be the road that leads to the West Harbor, and it does look kind of familiar. 

It's just that the Jätkäsaari area has now been built full of highrise, and the DLC doesn't quite reflect these newer developments.

Tyynenmerenkatu.

Outside Helsinki, the scenery between cities does give a nice impression of the usual Finnish motorway, the surroundings forests, fields and the occasional old shed.

Coming from Tampere to Helsinki did spark some recognition, Riihimäki is somewhat represented (though not named) and the Linnatuuli station complex is there by name of "Linna Tuuli" but the structure over the motorway has not been replicated.

The usual Finnish road.

For a moment I get some Martinlaakso vibes before entering Helsinki, but I'm redirected to the Ring Road again so I don't get to see the actual beginning of Mannerheimintie.

This could be virtual counterpart of the long-standing Lahnus Shell station, facing southeast, even if the surroundings are not that similar and the road that leads to it from Helsinki turns somewhat sketchy. But the south side of the station has a (non-driveable) road leading north(east), corresponding with the topology. Change my mind.

Lahnus Shell

Thursday, 12 October 2023

Carrier Command 2

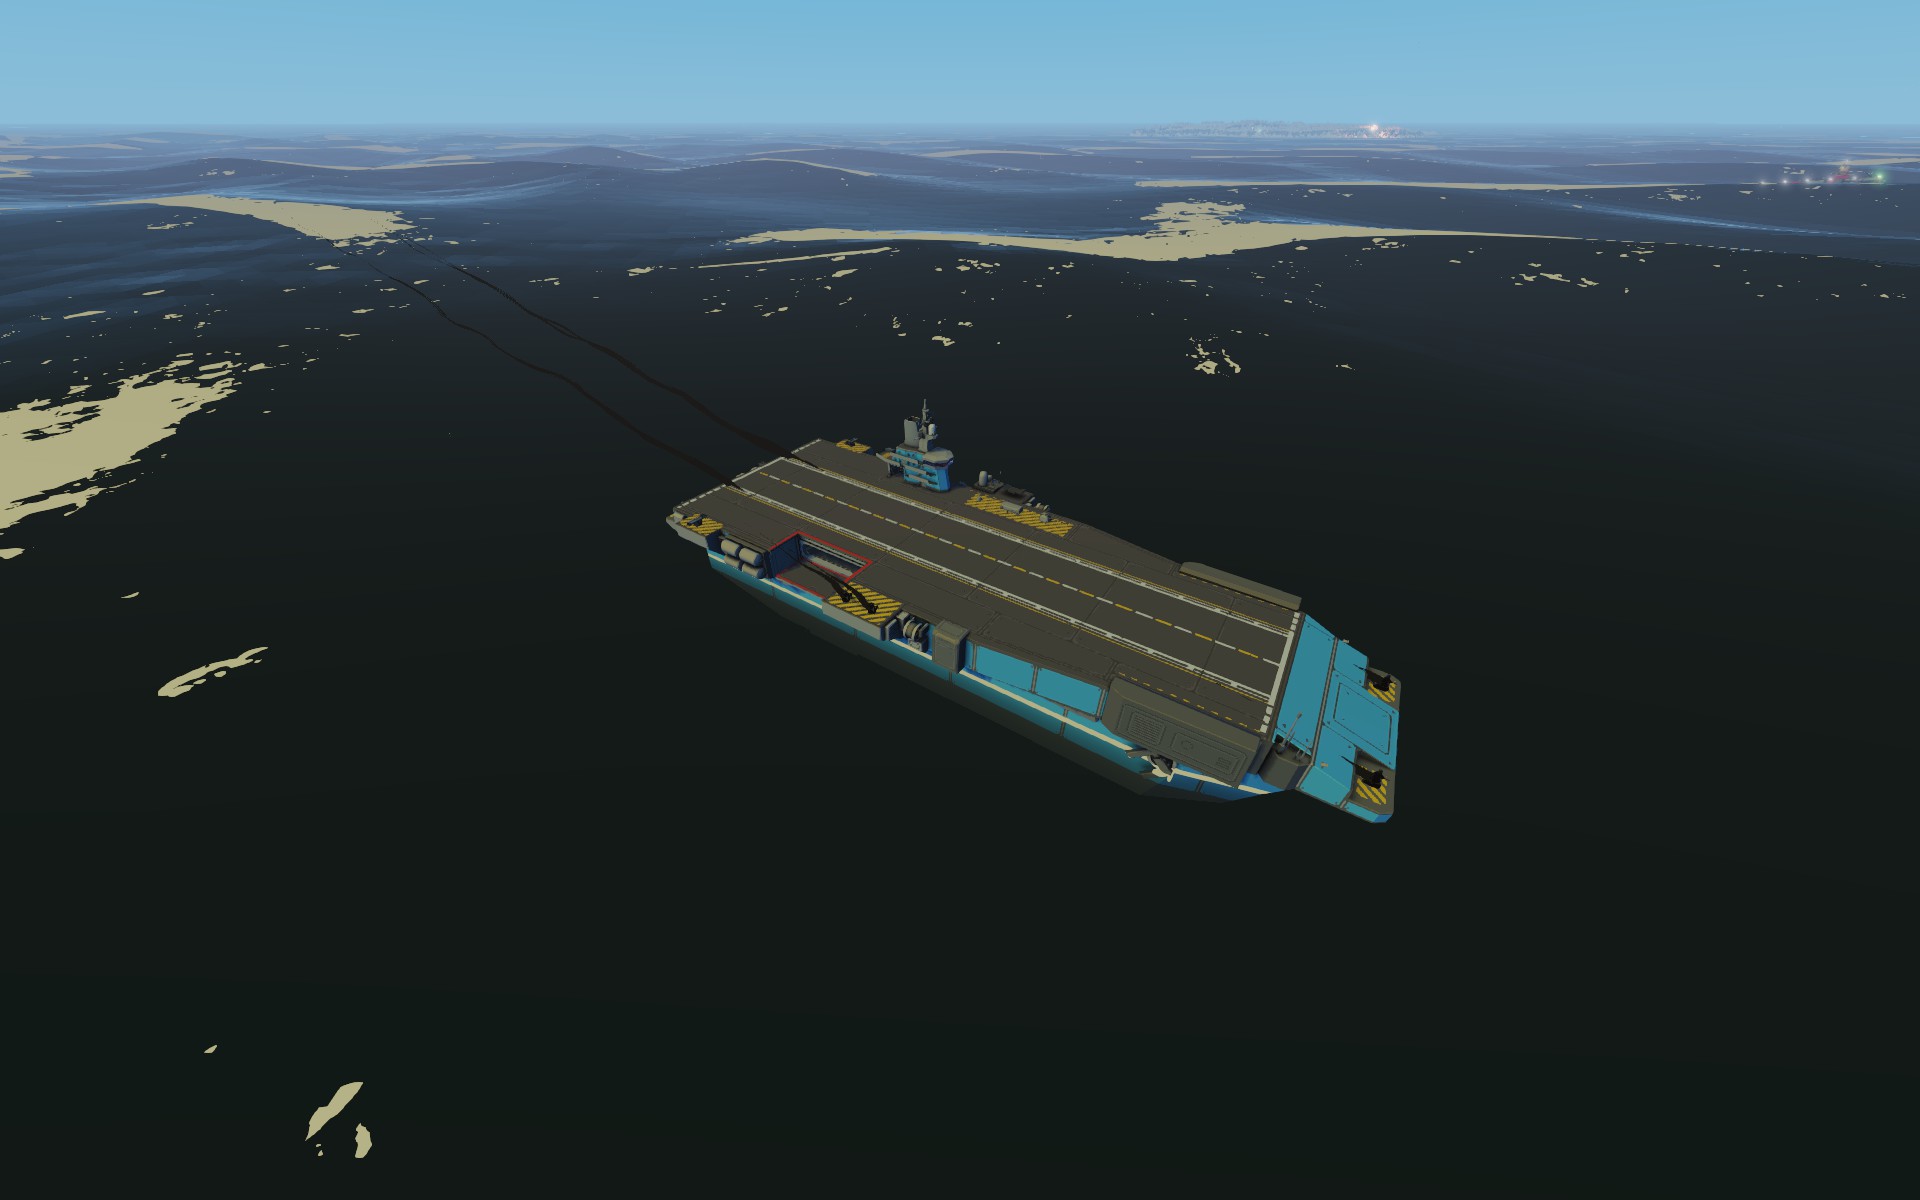
The titular Carrier

The original Carrier Command from 1988 ran on Amiga and Atari ST. This was the pinnacle of 16-bit home computer gaming: a technical tour de force of solid 3D graphics, multi-vehicle control and a complex mouse/icon-driven interface. 

It's like a demo of what would not be possible on the 8-bits. And then it was converted to ZX Spectrum too.

The technicality and multi-screen play covered a fairly simple strategy game focusing on the control of a handful units, made more tricky by the real-time aspect and the delightfully cluttered interface.

Carrier Command on the Amiga

Yet Carrier Command remains a cult game and many have probably wondered if the concept could be updated for more recent computers.

As the Microprose brand returned, I had my eyes on their future offerings for a while. Then, crucially, Carrier Command 2 (2021) was released and I only found about it a year later, thought it was little weird as the original was published by Rainbird. Another year passed before I bought the game from Steam.

It's not the first time the theme has been resuscitated. There's also a Carrier Command: Gaea Mission (2012), but that Bohemia Interactive interpretation has some Halo knock-off fps elements which put me off. Perhaps some day.

This is not a Linux game originally, but as usual, Proton to the rescue. I didn't experience any in-game crashes with Proton 7.0-6.

All aboard the Carrier

Carrier Command 2 is surprisingly almost the same game concept as the Amiga original, and this is what piqued my interest.

You are in control of a retro-futuristic carrier, with the goal of conquering an archipelago of small islands, or the destruction of the enemy carrier. The enemy carrier is wandering about with a similar purpose.

Most of the screens at one glance.

The first impressions were very good. The prologue brings the player down from the orbit on to the surface of an alien world, and on board the carrier. 

There is only a minimal amount of story content and the game is not split into on-rails episodes or smaller portions.

The campaign is a complete simulation of the war on the archipelago, and one run can take tens of hours. Bad choices early on can result in a game over that only becomes apparent much later.

Indie-esque art directorial choices and budgetary constraints are evident, but the creators have focused in the essentials and still managed to make a nice looking game.

The captain's holodisplay, neat but rather useless in single-player mode.

The Carrier and the weapon systems are imaginary sci-fi equipment in an imaginary world. The alien feel is heightened as no-one else is around except you. 

The simple step-by-step tutorial at the beginning shows how to switch on power, move about, how to use the Carrier main gun and how to deploy vehicles.

Instead of clicking various icons over different screens, the player has to walk about and man different stations, and use the screens from there.

Many buttons, switches and levers can be activated in the "physical" space too. Much of the added detail and complexity relates to the on/off and brightness adjustment buttons connected to every screen. It's also possible to wander off to the sparsely modeled Carrier interiors, but this serves no real purpose.

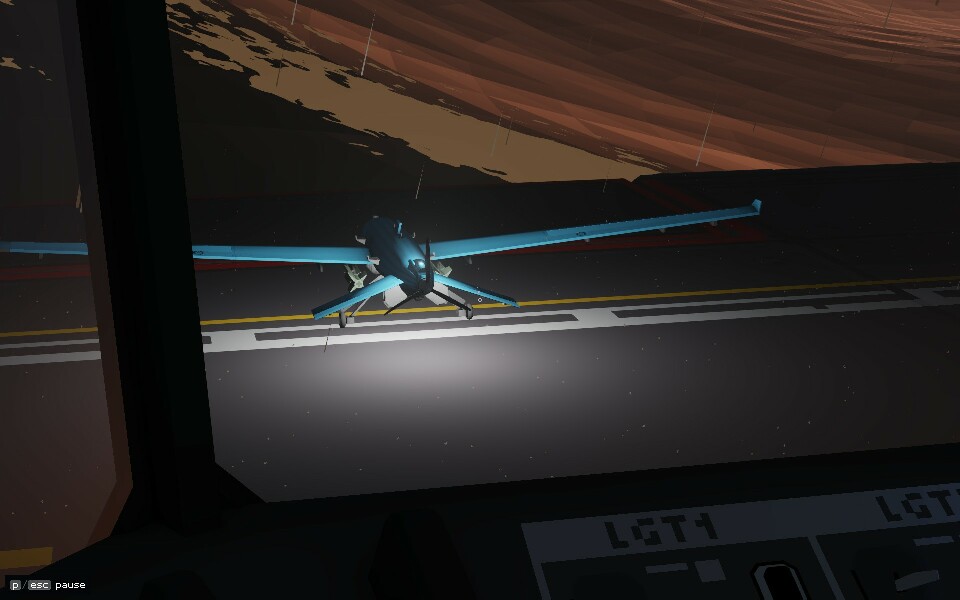
Weather changes and the day cycle add to the atmosphere

The approach makes sense considering CC2 has a multiplayer mode where a complete crew can man the bridge stations and do different things in parallel, also using virtual headsets. I doubt I will ever test that.

Playing solo involves hopping between stations to do actions that in principle could have been done from a single screen. It is difficult to handle multiple vehicles and the Carrier attack/defense systems in the heat of a battle.

But the original game also showcased similar type of thinking and the game might lose its essence if there was an effective keyboard shortcut for every action.

There's no overall "God's eye" camera of the surroundings, you only see what "you" see, mediated through cameras or not.

The tactical display, where the various assets are controlled

Actions take time. Deploying some of the vehicles is especially slow, and firing main guns does not happen instantly. In the Amiga original, you could at least fire the deck laser gun in frustration, here you need to designate targets and wait for the gun to fire.

It does make me wonder though why I cannot delay the last "fire" order until after the gun is ready?

After deploying amphibious surface vehicles, helicopters and planes, these can be controlled using waypoints on a map.

It is also possible to enter the camera view of each and guide them directly. Taking manual control at a crucial moment can be useful, as the vehicles can sometimes be painfully passive.

Enemies can be visually eyeballed from far away, but unless they are scanned through a specific kind of camera, they won't identify permanently on the map. Further scan is required to identify the weapon systems, after which the enemy weapons reach become visible as circles.

An Albatross being deployed.

Install this gimbal camera to an Albatross or a Petrel and you can "paint" enemy targets and activate Carrier main weapons from above via in-flight screen. Not always the easiest approach.

In any case, a tiniest mistake in the approach can lose your precious vehicle(s). There's a way to make more, though.

The scale of the game is far bigger than the tiny islets in the Amiga version, which means the islands span multiple kilometers. On one hand this makes the situations more complex and realistic, but on the other hand there's a lot more waiting and flushing out of enemy units. This choice really highlights how abstract the original was.

Conquering the islands is (as far as I see) achieved by dumping virus bots near the command center of the island. This can be tricky, if there are enemies around they will most certainly shoot the virus bots first and the attack will be repelled. This can easily happen even in the "tutorial".

SEALs carrying Virus Bombs, viewed from another SEAL.

At the beginning, nudging between waypoint and hands-on mode was essential to gain an edge over the opposition who has similar equipment and the player can't afford to lose anything.

Sometimes a huge number of enemy tracks becomes stuck at the same position, and one cruise missile or a volley from the Carrier main gun can get rid of them all. Knowing this made some of the approaches more manageable.

After the tutorial is over, the player is left alone with the manual and the humongous carrier and all its sub-systems. Frankly, the in-game manual isn't that helpful or even very readable, and it might have been helpful if there was another tutorial explaining the archipelago logistics even a little. Fortunately, there is more information online.


Barging in

The important tidbit: Unless you conquer an island that can produce fuel, your Carrier will run out of it rather soon. 

To refuel the carrier, you need to master the poorly documented topic of Barge ships. Barges can replenish the lost resources of the Carrier, if the materials are available on your conquered islands.
The Barge is bringing me more missiles, Albatrosses and Razorbills.

To start production in an island, you go to the logistics screen and activate the island's icon from there, forming an production order queue.

Only the barges can bring you materials, it doesn't help at all if your Carrier is sitting next to a fuel-producing island.

You first need to place an "order" for the equipment you need, otherwise the barges don't know what to carry. After this has been done, the barge waypoints (logistic screen again) are dragged to the source of production (island icon) and then the carrier.

The barge waypoints cannot be set from the tactical screens, where the deployed vehicle waypoints are set. Go figure.

The second barge is unloading fuel to the Carrier.

The Barge appears to be at least as fast as the Carrier, but it does take time waiting and it is better to try to anticipate needs and do parallel tasks instead of doing things in sequence.

However, just as you get fuel logistics rolling, you'll soon find out the ammunition is running out from the main gun, you need replacement vehicles, missiles etc. and each of these categories require different factories.

You eventually need to build more barges to maintain logistics across your widening grip over the archipelago.

Taking the barges too far from the map can slow them down to a halt without warning, just so you know.

In my opinion the barges sometimes refuse to start loading the ordered materials without any kind of explanatory message, and this can be a little frustrating.

Part of the Archipelago islands and their resources on the Logistics screen.

End Note

Carrier Command 2 is an unashamedly long-winded simulation game. After about 24 hours of game time I can say it has been a rather interesting experience and I'm far from understanding it all.

Much like the original Amiga Carrier Command, I will remain mostly perplexed about how to go about playing it, and will probably not even try to complete it. I can see the game is able to keep up excitement, as new things become unlocked and discovered. The game has far more variety of equipment than the original had. 

My first campaign proceeded slowly, trying to figure out the barge logistics and how each weapon subsystem works, nudging each island assault carefully with the scant resources. All while the enemy struck a rapid and fearsome division into the archipelago.

I tried encountering the enemy Carrier once, with glorious fireworks both over the sea and over the nearby turret-infested island. I did not prevail.

The first encounter with the enemy Carrier, with obvious results.

I find myself reverting to saves quite often when things go wrong, which is another sign of an old style gaming. Possibly the package could have benefited from having a few more piecemeal missions and a "tiny campaign" after a tutorial, with saves only between operations.

But it is fascinating in many ways. There's a serene and watchful atmosphere. The carrier chugs along, closing in on an enemy island (there's no accelerated time). The waves on the alien world grow high, forcing the ship into impossible angles. The rain subsides, evening darkens and I spot flickering lights in the distance of an island buried in fog...

One of my biggest gripes has to do with what is really a small detail. The trees. I can bash the island with the biggest guns on the Carrier, resulting in impressive fireballs that light the sky and the surroundings. However, the trees do care not at all, not even a single pine needle or snowflake falls off from their branches.

Raining destruction on the enemy tracks

I wish the starting point for the island modeling had been the fact that it will be pounded by missiles and guns. The terrain ought to blacken, trees and small buildings blown to smithereens.

Based on this new game, I still think there's life left in the old Carrier Command concept. If only Midwinter (1989) was remade with similar sensibility. I'm having an eye on Microprose's Tiny Combat Arena, which is in early access.

Edit 20.10.2023: Completed!

I did complete the game after all. It took 46 hours. The cracks and flaws in the single-player campaign begun to emerge, and I felt the destruction of the enemy carrier was a result of combining some tactical insight and very nearly using "exploits".

After depleting the enemy carrier fleet and its resources, its destruction wasn't that difficult and perhaps even a little anti-climactic, considering my earlier encounters with it tended to result in sudden death.

Perhaps I will come back to this in more detail. But it does seem that if you manage to take over more than 10 islands your global energy budget is so high, the islands can be covered with defensive turrets, and the warehouse can produce almost constant feed of Needlefish ships.

Saturday, 23 September 2023

Lancess Priya plus/4

I found some time to convert the Lancess Priya game to Commodore plus/4, the underappreciated little brother of Commodore 64. I formally demo'd the plus/4 version at the Skrolli magazine demoparty at 23th September 2023, and the game is now available at plus4world.

Lancess C64 made extensive use of sprites to generate the dashboard and fireball graphics, so all this had to be made to work in the pseudo-pixel character graphics.

But this was not a great problem, some of the font elements could even look nicer when they are more chunky. I already experimented with it on the C64 version before deciding on the sprite approach. This also simplified the interrupt a little, as there's no need to multiplex sprites.

The fireballs (enemy shots) were the toughest, as these needed to be drawn differently. I believe the added speed of the plus/4 made it possible to draw them without noticeable slowdown. The graphics also use less space than the sprites, which although not necessary, made handling memory issues easier.

The fireballs, taken together with the sights also means the gameplay area is quite monochromatic. The sights cannot be moved in every frame like in the C64 version, but I felt this wasn't a problem. I added some color to the texts, to take at least some advantage of the platform qualities.

TED sound is much simpler than SID, so it didn't take long to have some sound fx and some abysmal ditties playing here and there. I didn't set the bar very high though! I ignored the SIDCart route this time as the C64 version soundscape was quite simple to begin with.

I took the opportunity to fix a few glitches and bugs found from the C64 version, these may be eventually released as a C64 v. 1.1.

-You could ambiguously "fly over" the towers, which wasn't very apparent if you fly closer to the ground. It made it look you could just pass through everything, but this was not the intention. The towers are clamped a little awkwardly to the bottom of the screen to prevent them from disappearing.

-The "deathstar" graphic in the space battle would wrap around in a rather silly way. I just couldn't be bothered for the initial release. I now made the wrap-around at least a little less conspicuous for this non-moon.

Lancess Priya at plus4world

Friday, 8 September 2023

The Raspberry-based Z88-wannabe

After playing with the portable Cambridge Z88 computer and reading little more about devices such as Amstrad NC-100, Epson HC-20, Husky Hunter/Hawk and the Tandy TRS-80 Model 100 (Kyotronic KC-85), I began to wonder if anything exists currently in the same form factor.

There are a few keyboard-display hybrids. There's the Ficihp K2 keyboard with an integrated display.  Another is a BQAA RGB keyboard, which looks larger with keypad included, and something called Kwumsy, a very similar concept.

These hybrids do not contain a computer. Expensive, and apparently geared more as an add-on for gamers and such, I passed these opportunities as something that wouldn't work for me and not easy to hack into a full portable computer.

But it became clear that mass-produced screens must exist for such devices, and I started planning my own version.

*** Some of the details are left vague on purpose – for inspiration only! I'm not responsible for destroyed Raspberries, lost data and house fires other than my own. ***


Model 100 or Z88?

Exactly ten years after building a wooden prototype to house a Raspberry Pi, I felt I could hodge-podge something together without going too deep into electronics or software development.

And yes, many have hacked Tandy Model 100-inspired cases for Raspberry, or even used an original case. Model 100 was far more widespread and better known than the Z88, especially in the US.

Hobbyists and crowdfunders have built some Model-100 successors, such as the Clockwork DevTerm, and the Ready! Model 100. Just looking a these makes me feel I don't want all that clutter.

My concept:

A no-nonsense slab computer inspired by Cambridge Z88, mostly for writing.

-Large-font terminal for focused text editing etc.
-No GUI/Desktop/Browser
-No mouse, no trackpad, no nothing
-No connectors
-Flat rubber keyboard if possible!
-Wifi is still needed there to install software and easy transfer of files

I would not break my Z88, and my project is not about building a computer inside that case. I probably couldn't get the parts to fit there anyway.

Well, off to hacking.


The screen

I started by hunting for a suitable display. The Z88 original design depended greatly on the availability of a particular LCD display, and I have a very similar design constraint here.

I would have liked to use an e-Ink display just for the added weirdness, because I've seen videos of people connecting them to Rpi. But I couldn't find anything close in the aspect ratio and size range I'd need. It's either book page territory or tiny electronic price badges.

Some of the first tests with the display, running Raspberry OS

Eventually I decided on a Waveshare 10.9 inch HDMI display with 320x1480 resolution. Another option might have been an 8.8 inch screen with 480x1920 resolution, but the proportions didn't look that inviting. And yes, the 320 is the default horizontal resolution!

It's a touchscreen, but I'm not going to use that feature.

I ordered the Waveshare from berrybase on ebay and received it soon enough. The package included the screen, HDMI cable, USB power cable, and an assortment of screws, stands and USB adapters for different Raspberry models. There's also a cloth for wiping the display clean.

Just connecting the HDMI to any old output of a computer doesn't work, the computer needs to have drivers. And fortunately the Raspberry Pi OS has that, and the product is clearly intended to work together with a Pi. 

It is a good idea to do the initial tests with the basic OS without jumping into the Lite OS or some other build.

The configuration is clean, but a little tall for my purposes.

A fresh desktop is a little annoying as the initial dialogues do not fit the narrow screen. Remember, the screen is horizontal in the 320-dimension. But after getting through this, it's possible to use the OS screen/display functions to rotate the screen.

A better way to do this is to adjust the config.txt and the display parameters prior to booting up.

With some more fooling about, I had a correctly rotated terminal screen using a 16x32 font (sudo dpkg-reconfigure console-setup). This gave me a chunky-looking 93x10 character display, inspired by the 8-line Cambridge Z88 display. After that I began to think of installing the OS lite version without desktop on a separate card. More about that below.

I feel the shape of the screen is quite close to what I want, and the product connects and displays the Pi screen with no big hassle. All in all this stage was a lot easier than I thought.

Battery

I did the initial tests with PSUs, but I was eager to start planning and building the case itself.

A thin battery would be desirable. There are really small products that cater mostly for no-display, low power operations. The JuicePi hats look a little daunting, eating all that space would be a little counterproductive.

A battery should run the Raspberry for many hours and the screen is likely to eat up power. So I tried to look for something sturdy, such as a power bank.

I bought an Insmat Exclusive PD3.0 Super Mini 10000mAh power bank, because it happened to be on the shop shelf and had promising enough parameters. It's about 18mm thick with 2 USB-A output sockets. This made it possible to power both the screen and the Raspberry instantly without any modifications.

10000mAh sounded like a minimum, a ballpark estimate says I might be able to run the Pi and the screen for a couple of hours.

I wish there were more flexible backlight options on the Waveshare, I could live with a relatively dim screen in this context. A similar display with ISP technology seems to have more options in this regard. Here, even the lowest setting is quite bright. Only in a very bright office environment it begins to look dimmer in comparison to other displays.

The power switch

There are a lot of tutorials on how to build a safe power on/standby switch, but nothing very reassuring about cutting the power physically. I think it should be safe to cut the power after I've issued the shutdown command, just as I have to do anyway when I pull off the cable.

I tried powering the screen from the Raspberry 5V out, using only one USB out from the power bank. This should be the same as sharing the input of the MicroUSB. But although initially promising, this seemed to cause problems and undervoltage, so I reverted back to using the both USB power outs separately, as it appeared to work better. Fortunately I have a switch that controls two separate power lines.

I'll discuss the undervoltage problems further below, it's not certain that powering the screen from Pi was to blame.

Keyboard

The first keyboard connected was a quality Apple Mac mini keyboard. This was all well until I noticed I had trouble getting <|> keys from where I'd expect. Changing the settings from raspi-config seemed to do nothing. Oh well.

I'm not going to mutilate the Apple keyboard for this project anyway, so I went for my old Deltaco TB-5V. Which, incidentally, mapped correctly.

This mediocre mini keyboard was cannibalized already before and it'll live again for this prototype. It's not quite as wide as the screen, which is fine. The keyboard model is rather good for repurposing, as the controller is still a simple separate through-hole board and the connections are easy to understand. I de-soldered the LED lights as I have no room for them.

I did look into the idea of using a laptop-specific keyboards, but getting them to work on a Raspberry is not as simple as plugging in.

First attempt, will everything fit?

For a more Z88-like experience, I wanted to use rubber keyboards.

Aliexpress does sell the aptly named 85Keys Foldable Soft Silicone Mute USB Wired Mini Keyboard Computer folding keyboard Accessory, but this has an annoying lump at the left side so it's a no-no.

Having that lump appears to be a common feature in rubber keyboards. Wetkeys sells soft-comfort rubber keyboards without a lump, but they also have a numeric keypad which makes them far too wide.

I'll forget about this angle at least for now.


Raspberry Pi : Putting it all together

From my loose assortment of Raspberries, I have a choice of 1/2/3. As I'm going to run a Linux terminal there with no graphics, I could even use some of my older Pis.

Explosion. The screen is still "upside down" compared to the final arrangement.

I settled with 3B+ for the moment as the Waveshare promises to work with it. I need to mod the Pi so I'd prefer not to alter the earlier models which might become museum items.

Admittedly, the 3B+ uses more power than many other models, and in the future it might be wise to consider Pi Zero W model for such a modest purpose.

The logic of getting the screen to work and rotate correctly may be a little different depending on the Pi model.

The Waveshare product included the screws and stands to fit the Raspberry below the screen, and at first I did just that. The HDMI-HDMI connector dongle is a neat addition which removes the need for a bulky, inflexible cable. The power cables however stick out from an unfortunate angle, which can't be helped now.

The HDMI-to-HDMI is neat, but the power cables are still in the way. Keyboard controller at right.

The Waveshare concept pointed to overall device thickness in the 40mm territory, which was a little too tall for me. I looked into how to either reposition the Raspberry or remove the tall USB connectors and the ethernet connector, and using lower stands.

Trying out various loose configurations, I kept coming back to the way Waveshare intended: Raspberry screwed together under the display. To get at 30mm thick device, I changed the 25mm stands to 15mm and removed the bulkier elements from the Raspberry board.

It might have been better to get a Raspberry 3A+, which is thinner, but I was a little impatient and some Raspberrys can still be a little hard to find.

Smashing away the USB connectors.

Removing the Ethernet connector with heated pump and soldering iron was almost possible to do cleanly. But for the USB it was far easier to just peel it open with pliers, cut and crush the parts inside. Then cut the wires and solder wires on the remaining "pins".

Sadly this means breaking and throwing away perfectly good parts. But now at least I could fit the display on 15mm stands, bringing the overall thickness to 32mm (The MDF board is 3mm thick).

Ultimately the battery height of 18mm under the keyboard decides the height of the computer, so there's no benefit in getting the screen any lower.

So, it's rather bulky compared to the Cambridge Z88. As a minor consolation, at 292x190x32mm the depth of the computer is at least less than the Z88. The chunky chipboard appearance is rather nice.

Figuring out dimensions in a LibreCAD section.

As mentioned, I eventually got electrical problems, at least the Raspberry was eager to show the "undervoltage" warning occasionally.

I really started to get these only after packaging the whole thing and connecting the power switch. So, this might be due to bad cables, connectors, soldering, or whatever.

But it might also be that this particular power bank doesn't give power evenly, and the display is such a power hog the intake will easily drop below the minimum. I don't have very clear specifications about how many amperes the display would like, Waveshare site suggests 3A and that's also the power bank nominal output.

The power bank specs are unclear about whether the separate outputs supply 3A at the same time, so I assume it the value is for the total.

The 3B+ Pi model is apparently a little finicky about the power input, whereas an earlier model might complain less. However the 2B doesn't have wifi, which would be a little too limiting. And besides, it might be a good idea to actually have these warnings so I know it is an area to be improved.

After I fiddled with the connectors and the wires, and gave the power bank a good recharge, I stopped seeing the undervoltage warnings. But the wiring inside is still a problem area and I'm not going to show that mess now.

The below image sketches out the basic case shape and especially the keyboard holder, but it's not a precise indication of how it was built and what kind of parts were used. I used clamps and wood glue to pile together 3mm cardboard and MDF pieces.

This Blender model was made after building.

OS and Software

Although the Cambridge Z88 served as a point of departure for this computer collage, I'm not looking for actual Z88 simulation here.

But just for fun I looked at software that could create a somewhat comparable experience, using the 93x10 character terminal as a tribute to the 8-line display of the Z88.

So, goodbye mouse and x, I use terminal-based Linux to boot into the command line, and launch Nano the text editor for productivity.

I installed the Raspi OS Lite on a new card, and adjusted the config.txt to accommodate the display format before even booting it the first time.

sc-im on

There's less hand-holding than with the full OS, but it's not difficult because almost everything can be handled using the raspi-config. (sudo raspi-config) I am glad I am somewhat more experienced with Linux and Raspberries than ten years ago.

First it's necessary to set the wifi country, the wifi SSID and passphrase itself. Again, using raspi-config. Only after that the network is accessible. Or use ethernet, unless someone has pried it off(!)

It's also useful to set the timezone.

There are some tricks to whittle away boot time, such as removing boot delay and the splash screen. Some services, such as the network, could be shut down – if the intention is to lose the internet. 

Reducing processor speed could also decrease power need, but perhaps not in total as the tasks will take more time to achieve.

The font and font size are best handled through sudo nano /etc/default/console-setup

Some initial software ideas:

Nano ought to be launched without the space-eating shortcut display. I would also show line numbers, as there's no other simple way to show where I currently am in the document.

nano -x --linenumbers --softwrap testnano.txt

-x disables the list of shortcuts at the bottom of the screen.

The --softwrap in the command line activates soft line wrapping, so the text contents of a line are always seen on screen, which depending on preference might be desirable or not.

Nano reconfigured. (Linux Mint screencapture)

I could try to add some of the Z88-feel by running the PipeDream hybrid spreadsheet/text editor software that was central to the Cambridge computer. After all it was available for multiple platforms, including DOS and Windows.

DosBox could run Pipedream DOS version and Rakewell offers a download for free.

Using emu2 I can run DOS text-based apps via terminal, which sounds interesting. After installing git, I could clone the repository and compile it.

https://github.com/dmsc/emu2

PipeDream on emu2. (Linux Mint screencapture)

PipeDream is far too troublesome to run in the limited terminal screen I prefer, as in the DOS way the screen is assumed to be of a fixed size. Troubles begin when you have to scroll the screen. From the little time I used that software on the Z88, I found it fine for that computer but have no great desire to see it running here. So I'll pass.

For a terminal-friendly spreadsheet, I installed sc-im the terminal-based spreadsheet. This requires some more compiling and fiddling with git repos, but it was do-able. The software isn't very simple, though.

https://github.com/andmarti1424/sc-im/wiki/Ubuntu-with-XLSX-import-&-export

sc-im (Linux Mint screencapture)

From apt I could directly install calc for calculator, or just use bc. These aren't particularly visual, though.

Calc is not to be confused with cal, which simply shows the month calendar. Which is, logically enough, installed through sudo apt install ncal

Again, hexcurse for hex editor, or hexyl for just viewing hex.

I tried Ranger for file listing. It can actually work as a kind of launcher for other apps, but I also found it to be bit slow to init on the Raspberry and maybe not that useful at this point.

Tmux the terminal multiplexer can enable complex task switching, splitting of the terminal screen and generally toying around. Obviously using ALT-F1, F2 ... etc it's possible to switch between logins and it might be enough, but with tmux I could have a text editor running on the left side of the screen and a terminal prompt on the other side.

The OS Lite has Python already installed for programming tasks, and the Raspberry GPIO pins can be controlled from there. Obviously the GPIO pins are not very accessible here.

Browsing could be a possibility, by using lynx or w3m.

For games, I installed Gnuchess. In my preferred 10-line terminal, the program doesn't display the game well. If it wasn't for the pesky "Thinking..." text, the board would fit. Using "show board" after each computer move works, though.

With the smaller font I could play roguelikes and...

But this wasn't supposed to be a web-browsing and gaming platform. I've installed so much junk already, the idea of a very focused computer is beginning to get muddled!


Some notes

What about emulating Z88 itself?

I would have liked to try this, but I couldn't get ozvm to compile easily even on a full desktop Linux Mint, and I have my doubts about getting it to work on a Raspberry OS. I gave up on that angle at least for now. Using the Circle environment, it might be possible to create a comparatively "bare metal" Raspberry Pi emulation of the Z88 computer, as people have done with ZX Spectrum. Someone would need to do that hard work first.

If the aim is to create something that fits inside the original Z88 case, this is not the solution as the screen itself is already too large.

I'm already somewhat through my "Z88 phase", and having a Linux terminal is really just more powerful and flexible. In the future I could look into reducing the boot time, which is still something where the Z88 really excels at. Oh, and also the Z88 battery life is much longer, but at least I can recharge the power bank.

Boot time is more than 20 seconds

If I have ever learned something about building stuff is that a detail not taken seriously during the design process is likely to end up haunting in the build. For this box, things like how to recharge the power bank, or how to change the SD card, were not really thought about that well. Therefore they ended up relatively unresolved. To recharge, I currently remove the keyboard and pull out the bank. For the SD card, fortunately I might not even need to change it.

As far as casing projects go, this was in some ways one of the simpler ones, as the display and keyboard are dropped in and there are no ports to consider. Perhaps I should have made 25mm thickness into a hard constraint in the beginning, but 32mm isn't really that bad.

Like I mentioned, the problems are more in the electronics side of things, and I haven't yet reached a conclusion. I have already seen the power bank last for the 2 hours I hoped for, although it looks that the undervoltage issues increase in proportion as the bank depletes. I may report back once the power bank has seen a few more recharge cycles.

Thursday, 31 August 2023

Z88 serial before and after OZ upgrade

Detailing my further adventures with the Z88, both before and after getting the Rakewell Flash Card/OZ 4.7.1 upgrade.

Just a little note first. I changed the batteries first time. To my joy, the capacitor held the charge long enough and no memory was erased.

But it did behave weirdly at first. The screen refused to light, and when I got it running the system began to complain about BAT LOW fairly soon. But this was a false alarm, the computer began behaving normally and the battery alarm was removed.

Serial port

As with pretty much everything about Z88, this is already rather well documented in a number of places and I'll just relate my own experience.

Here I'm first discussing the Z88 without the OS upgrades, then with the OS upgrade that improves the serial performance and has Xmodem and Ymodem protocols.

This is how I soldered the cables, and it seemed to work.

Nominally the standard Z88 can handle 9600 and faster, but for receiving data the Z88 cannot handle the speed and presumable the buffer becomes overrun very quickly. I had to add delay of at least 5 milliseconds after each character to get the transfer to work.

Furthermore, without any protocols, binary bytes have to be sent as [ESC]B [High][Low] so [ESC]B1F means sending 0x1F over. This means sending 4 times the data you mean to send! 

The ultimate test was sending the binary of the Jet Set Willy conversion over, called jsw.c. This is 19388 bytes long. Using the binary method, the overall data sent is 77552 bytes! Using the reliable 5 millisecond delay gives 387.76 seconds of "loading" time, nearly 7 minutes.

The speed can be improved slightly by sending ASCII 32-127 as direct characters, and 0-31 and 128-255 in this binary mode. However you'd expect less than 50% of data in a binary file to fall within the 32-127 range. For example the jsw.c file has 12941 bytes to send in binary mode and only 6447 direct characters. So the data-to-send is reduced from 77552 to 58211 which is still quite ridiculous for a 20K file.

JSW has to scroll or squish on the Z88

Later, with my upgraded Z88 I was accidentally using only 1 millisecond delay for transferring files in 9600 baud rate to the Z88, and it worked well enough.

All this became rather academic as the OZ 4.7 has built-in X/Y modem protocols, which are both faster and more reliable.

With Xmodem you have to type in the filename to be received, and the file lengths may be mis-adjusted to multiples of block length. With Ymodem both these problems go away, and also I don't have to bother about the "4 bytes to send 1 byte" dilemma as all is transferred in binary.

Receiving the 19388 bytes of jsw.c took a little under 30 seconds in 9600 baud. I got closer to 15+ seconds using 19200. I did experience some hiccups in getting the Z88 to catch the file in the first place, though.


Getty

I used getty to give login access to the Linux computer through the USB-COM adapter.

Initially this looked fine as the login and password prompts appeared and I was in.

Again, using 9600 on the basic Z88, any commands that produced more text, for example, listing the folder using ls, or using "more" to display a plain text file, would overrun the buffer.

Upgrading a Linux remotely

So, switching to 2400.

sudo /sbin/agetty 2400 ttyUSB0 vt52

...yielded better results. Keys like TAB don't seem to work and, what would you use for Control? Apparently nothing, although these should be alterable from the receiving end.

Trying getty with the Upgraded OZ 4.7 did not behave better, 9600 was still unusable and I had to revert to 2400. This was a little surprising, not sure why this should be.


The upgrade itself

The Rakewell Flash/512K RAM card fits into the Z88 card slot. The Flash portion can be semi-permanently written and the content won't be destroyed even if the batteries run out. There's a bunch of RAM so it's unlikely I need to keep the other cards in.

Importantly, this card also holds the operating system version 4.7, without having to do any changes to the insides of the Z88.

The physical cartridge is a 3D print which is fine, although not as smooth as the original Cambridge cards. When it is mounted I'm not going to see it anyway.

There are now multiple keyboard settings, which makes sense as there's no point in compiling the ROM for different Z88 keyboard. So I can choose Finnish keyboard. The funny thing is the keyboard layout choice also affects language in date displays etc., it's a nice bonus but really ought to be separate.

New functions relate to the flash card, as it's now possible to haul files from the flash card over to the RAM, but also "burn" files to the flash, just as the EPROM cards supposedly worked. Again, deleting the files will not actually remove them but mark them away from the flash card list. So, eventually the space will run out and it may need reformatting. Luckily this can be done from the system itself, but I'll discuss it more if that day arrives.

I can also appreciate that files can be peeked with a hex/ASCII viewer.

BBC BASIC has been given that graphics patch built-in. Use MODE 1 to activate, the screen is split into text portion and a 256 x 64 "graphic window". 

It's not very fast

There's a bundle of applications and files already on the Flash card, including unzip/zip applications, ROM/EPROM digging and utilities for memory monitoring and disassembly. Some of the material is zipped, and it gives a kind of early 1990s feeling, delving into the text and materials an waiting for zips to unfold.

But if a plain Atari ST was slow at unzipping, then obviously a slightly compromised Z80 chip is going to be even slower! Luckily the files are not very large.

Sidenote: Chezz

One thing I wanted to try is the Chess program, converted from ZX Spectrum Cyrus chess. Previously there was no way to run it, because it was not possible to "install" software from RAM. 

It's chess alright

This was a huge process, as on the Linux side I compiled mpm-master, z88card-master, mthtoken-master, and then z88chess-master to get the chezz.app, chezz.ap0  and chezz.ap1 files. Then I transferred them via the serial to the Z88, selected the .app in Filer and used the <>INS command to install the application. After this it will be listed in the Index.

When listed alongside other applications it can be run. The screen is small and I'm forced to use the arrow keys to enter my moves. Fortunately the sound can be turned off! Playing a couple of fast games, I both won and lost to level 2.

Crashing?

After using the card, I experienced PipeDream crashing, even without doing much else with the computer after the hard reset. It happens rather often, and this is a little sad as I encountered nothing like that before, and I mostly used PipeDream before the upgrade.

The Z88 just becomes unresponsive, no keys work and I have to do a soft reset. The cursor keeps flashing, and if the beep is on the key presses cease to beep. The flashing cursor might not be indicative of anything really, it might be even a part of the LCD features.

I have no way to make really sure if the card is faulty or the computer has a problem which only becomes apparent with the card.

I resorted to using Diary app for random typing, which did eventually crash too, but far less often than with PD.

In Summary

I had good fun exploring the new capabilities of the system and the card contents. Much of it is interest only to developers and tinkerers, but the basic premise of Z88 is already greatly improved with the better comms section. I'm also hearing the OZ 5.0 might be arriving, overhauling many a thing in the process.

Sunday, 30 July 2023

Lancess Priya C64

I made a 3D-ish shoot'em up game for the Commodore 64. At the moment, the file can be downloaded from CSDb. Grab a joystick and play.

The following is mostly about the background inspiration for the game.


Star Wars Arcade 1983

The Star Wars arcade game by Atari is maybe the greatest arcade experience I ever had.

I'd like to reminisce how I poured coins endlessly into the machine, but in truth I likely played the real coin-op only a handful of times.

And maybe for the better, as the home version on C64 and Amiga showed the game in itself doesn't have that much longevity. It's perfect for arcade, an audio-visual-physical experience leaving you hungry for more.

I can pinpoint my likely first encounter with the game to July/August in 1984, when a cabinet was present at the Space 2000 (Avaruus 2000) exhibition in Dipoli building, Espoo, Finland.

At that time I didn't quite get the 3D perspective and probably the colorful Zaxxon next to it made a bigger impression on me. I'm even unsure if I personally played Star Wars at that occasion. Later I experienced it both as upright and cockpit versions in amusement parks.

Commodore 64 versions

Domark/Vektor Graphics: Star Wars, Space battle and navigating the surface

There's a brave conversion made for the Commodore 64 by Vektor Graphics and published by Domark in 1988. 

Although this version is nearly complete, it is also slow on the C64. Using a smoothly moving sprite for the crosshair does mitigate it somewhat. Some 8-bit computers lacked this advantage, but the BBC Micro version looks rather fast, although it has other problems.

Domark/Vektor Graphics: Star Wars trench run

The space battle is faster, but I also notice the enemy ships rarely come very close, and the action is often obfuscated by the ever-growing mass of fireballs.

The tower scene is very impressive, the ship rolls and there are many towers and bunkers approaching. There's also slowdown at times. The tunnel works very well, it has a lot going on and yet it isn't that slow.

The earlier Parker Brothers' version of the arcade game made around 1984 is also well known among Commodore 64 users.

Parker Brothers' Star Wars: Tower scene and Trench Run

The Parker game is not very impressive, but it is fast and the tunnel section is nice, it has lot of catwalks and a three dimensional projection of sorts. That portion isn't especially fast, though.

The tower scene does not have ship roll and the towers chug along in steps, not well synced to the dot effects on the ground. The on-screen player ship elements don't move at all, further adding to the stiff feel of the game.

The space battle is especially lazy, there is no attempt at all to have the TIE fighters in different depths. It is still nice to play. The Atari 2600 version is in some ways a bigger achievement, considering the limitations of that platform.

Parker Brothers' Star Wars: Space Battle


Lancess Priya

I began asking myself if there was a third path, something that was faster than proper vectors yet would not look so silly as the sprite-based enemies.

The result, Lancess Priya, is more of an "inspired" mini-game and not any kind of attempt at full conversion. All my games tend to be quite short, partly because of necessity and secondly because I usually prefer short games when I go vintage (Blue Max, Rambo, Saboteur, Bruce Lee...)

The game lacks many elements you'd find in the Star Wars game, and adds some that weren't really there. For example, here you have a direct control the ship even in the space battle, and you can dodge the fireballs more easily as they are not "stuck" to the screen position.

Lancess Priya: Space battle and the Trench Scene

I could say I'm using the the Parker Brothers' version as a springboard, building up from the compromises present in that game. Here the lasers aren't full beams, but small bolts, and pre-calculated character graphics instead of full vectors are used to draw the enemy fighters.

The number of objects and lines has been reduced to the minimum where I could still get it work at 1/2 frame rate, also using the full frame rate reticle trick from the Domark game.

It's tricky to get a screenshot that would make the game look very interesting, but it does look a little better in motion, I think!

Lancess Priya: The tower scene


Some technical notes

One day I might make a more thorough technical breakdown of the development process, here I only give a brief explanation to why the game looks like it does.

I toyed with the idea of making a PETSCII character-based game, but after a couple of doodles of TIE fighter frames I felt it would not be the route. The idea of using pre-stored animation frames did stay, though.

The PETSCII experiments gravitated towards using the 2x2 blocks for more motion accuracy, which made me ask whether it would make more sense to use self-defined characters.

So, this new game would use a pseudo-bitmap display built from characters, but not the ones included in the PETSCII set. Splitting one character into 8 cells gives me an 80x100 resolution.

This is quarter the amount of pixels compared to 160x200 resolution, and the benefit with a character mode is that it uses less memory and can be faster. Animation frames can use less memory than sprites for a comparable screen area. Line graphics aren't enormously faster than I guess bitmap drawing would be, probably because I can't write fast routines.

One byte defines a physical screen area that would need 8 bytes in a bitmap mode, this also means I can use 1000 bytes to define the full screen instead of 8000 bytes of bitmap. Or 2K versus 16K in double-buffering.

There are 256 characters ranging from empty to full, based on the above bit pattern.

More technically, there are some occasions where left/right can be adjusted by ROL/ROR instructions, and vertical shifting isn't that expensive either.

I decided the routine should work on 25fps if possible, or it would not be worth it. I worked with 1/3 framerate in Digiloi (2018) , but that was full color 2D character graphics.

So, the end result works on a double buffered character display with 80x100 effective resolution.