Showing posts with label kickbike. Show all posts

Saturday, 15 July 2023

Shortening the kickbike

One of the reasons for buying this particular model was it looked like it could be modified easily.

Previously, I have already removed the wooden deck addition and shortened the handlebars. Now I had something bolder in mind.

I have been thinking of two ideas. One was to remove the "wings" at the side of the deck, possibly reducing some weight.

The other idea was to make the deck shorter, both to reduce a little weight and improve the maneuverability (hopefully). This seemed more interesting, and I was a little worried removing the wings might compromise the strength of the box and make it a little too narrow.

I had suspected the outer case could hold inside a relatively large "inner case", but it turned out the part that goes in is much smaller than I thought.

Sketch, not to scale

There are 4 bolts on top, 4 at the bottom, and then 2 at the sides.

Obviously one of the side bolts had to be gloriously stuck, so I had to waste time in removing it. After ruining the hex, I realized I could file the bolt into a more rectangular shape and use a spanner to turn it.

After some nudging, the block connecting the stem to the chassis falls out. The portion that goes inside is only 27 millimeters deep, and the shape is irregular. It is quite hefty.

The connecting part

I could have taken better photographs, but maybe the opportunity will yet arise.

Then began the process of measuring and deciding how much to cut away. Peeking inside, I could see there's virtually nothing at the front 14cm part of the compartment.

I eventually chose 6cm as a suitable amount. There is a hatch at the bottom of the chassis, and if I cut for example 10cm, the hatch edge would be rather close to the front. The other thing to worry is the 28mm radius cable hole in the side.

The 6cm should be significant, but this also leaves some empty space inside the box.

Not all the space is used up.

I was a little lazy and traced the lines around the box using a vernier caliper adjusted to 6cm.

After that, I started sawing with the hacksaw. This is a boring job and I split it into two sessions for two different days. Together it took more than an hour with some pauses.

I'm not very skilled with the hacksaw, but I managed to do it accurate enough. Patience is key, otherwise it's easy to start doing things too hastily, resulting in a mess.

Removing 6cm from the front...

The case is some sort of aluminum alloy, which is quite soft to cut and drill. 

Only afterwards it occurred to me the process could be generating some fine grain aluminum dust, apart from the stuff I could obviously see.

One thing to look when cutting a profile like this is to have an eye at where the other part of the saw is moving. While focusing on the actual cut, the saw might be stealthily ruining another part of the cut.

The part, cut loose

Compared to sawing, the drilling was quite easy and fast. I took the measures from the original piece, and just transferred these over to the desired positions. 

I used 2mm drill for making pilot holes, then an 8mm for the actual sizes. I used ridiculously low speeds here, probably only a few revolutions per second.

Drilling new holes

The original holes were not perfectly round, especially the side holes are more like very short routing lines. I just hope there isn't a really precise logic behind that, possibly just a result of using an automatic router.


The results

I believe shortening the deck improved the drive-ability of the kickbike. It shouldn't be a huge difference, but I think turning tighter corners is a little less precarious.

The distance between the wheels is now shorter than the Voi, which is something of an accident as I had previously measured the distances incorrectly. It might have been nice if the wheels have the same distance. Well, the subjective experience should be more important than the measures.

But did I get rid of any weight?

Carrying the bulk might be slightly handier because of the smaller dimensions, but it's such a small difference it cannot be really felt as weight difference.

I'm going quantitative

The cut part really was one of the lightest things I could remove, so the effect on that front wasn't that great. The cut aluminum part weighed only ~245 grams. Taken together with the plastics it's a little closer to 370 grams.


To put things into perspective, what things weigh:

The 6cm aluminum alloy part: 244g
The 6cm aluminum alloy part and the plastic parts together: 372g
The plastic parts: 134g
Wallet: 160g
Smartphone: 300g (!)
All the keys in my pockets: 145g
Bike helmet: 323g

The kitchen scale measures fluctuate a few grams so the values are not very accurate.

At least the removed material compensates for wearing the helmet!

It's obvious I could lose more by leaving my phone, wallet and keys home.

Measuring the cut out block against the 244g weight pointed to a material density of 2500kg/m3.

Apparently aluminum alloy density isn't likely to be lower than 2660kg/m3, I might be persuaded to believe my measurements are off. The piece has holes, the scale isn't accurate, and so on.

As a ballpark estimate, the central chassis metal part does not weigh more than 3kg. (The battery and other stuff inside are probably heavier.)

I've yet to measure the weight of the entire kickbike (Probably around 28kg originally) so I'm not sure what kind of percentages the removals represent. Also, taken together with the driver's body weight it means very little in the entire system. 

The next step is to cover the openings. I could even cut some more material and try to fit the indicator lights back the way they were.


Monday, 17 October 2022

Extenders

It's not worth having a bike or electric kickbike, without also having something to nerd about constantly.

As already mentioned before, I added a handlebar extender that enabled me to shorten the handlebar a little and still place the display to a comfortable position.

The extender has served well, but did not in itself help attaching a phone.

I saw this Wave Bike Clip and bought it off the shelf. Now this might be one of the crap and cheap solutions before I eventually find out I have to buy a Ram Mount anyway.

For me there were two main reasons for getting the phone holder.

First is the idea of having a map more easily accessible, which was one of the problems with the 28km planned journey I had. Stopping to dig out the camera out of the pocket every now and then was a nuisance.

I probably wouldn't even keep the map constantly on, it would be too much of a distraction. But it would certainly be easier to visit the map.

The second reason is to check the speedometer against a GPS-based speedometer app on the phone. This I only needed to do once, really. I confirmed the built-in speedometer is adequate and calibrated correctly. (It can be re-calibrated)

Given this accuracy, strangely enough the internal odometer is not very precise, at least compared to Google Earth. However this would also require more reference points, can I even trust Google Earth?

The Wave Bike Clip is in the middle, in closed position.

Filming video might be one possibility, but I'm not currently that interested in it and also suspect it would be really shaky.

I tried various ways of attaching this phone holder, which unlike the first extender only really fits to the actual 22mm handlebar and not the thicker bolts.

At one point the vertical stem looked like a better place than the crowded handlebar, but the gimbal couldn't provide an angle to do this well.

So, after trying different angles, I just attached the phone holder to the extender like I did at first.

There's also the issue that the collapsed package can also increase in size with these extenders.

The holder is quite shaky even on smooth pavement, and I kept fearing the phone might fall off, which I guess is unlikely.

The shaking may be because I have bashed together an extender on another extender, but it also made me appreciate how sturdy the first extender is.

The phone buttons are a small annoyance, of course they are exactly in the place that prevents me from centering the phone better.


Sunday, 18 September 2022

Anatomy of a Crash

Lately, I have been a little silent about my electric kickbike.

I always felt that since I don't drive drunk in the center of the city in the middle of Friday night, I would be immune to crashing. Not so!

My other pet theory said if I would crash it would likely be a collision with one of those ultra-fast cyclists. Not so either!

All happened in broad daylight through my own actions.

Some background. I had driven for more than 25 kilometers that day, experimenting with maximum range. After loading the battery half-full and getting a lift I headed back home, looking to drive some 10+ kilometers still.

The Grand Tour of Summer 2022

At that point I had my fill of driving for the day and had become tired and a little irritated. I just wanted to get back home quickly.

The crash occurred in middle of a central park, on non-paved roads with trees close by. It is something I'm not that experienced with, although I had survived the area earlier that day going the other direction. I diligently slowed down whenever there were other road users about, but when the coast was clear I often went for the 25km/h.

The story I have been telling since then went something like this:

Suddenly, the road profile changed rapidly from flat to a central bulge. I found myself veering towards the woods and could not brake efficiently enough. Something told me I should not try turning towards the middle of the path. Before halting, I hesitated and kind of semi-jumped off the board, letting the kickbike go over.

The morning of that day, not the actual crash site

I may have reduced the speed to possibly 15km/h or even less. Obviously when my feet hit the ground I could not keep balance, I rolled and fell on my left side, the shoulder taking the brunt of the impact. As my head lolled it took a bit of a knock too.

After swearing loudly and feeling my head for any blood, of which I found none, I lifted the kickbike, eyeballed it for any major damage and started immediately driving again. My two first thoughts were the fairly irrelevant "luckily no one saw this" and the more appropriate "why the fuck I didn't buy a helmet".

I soon felt it's insane to continue and needed to sit down, worrying about possible concussion. Taking stock of the situation, I realized my shoulder is very hurt, but that I could still navigate to home. After reaching there, I lied down and felt my collar bone and shoulder. After some Googling and a phone call it was off to the doctor. They confirmed the suspicion but fortunately the fracture was not major. A few weeks with an arm sling and a total of 6 weeks of recuperation would do.

It is somewhat fortunate the kickbike did not become damaged, although if I could now make a trade I would have preferred to have stayed healthy.

For a month I would not drive at all, and especially did not drive my own kickbike as I absolutely could not carry it in the stairs. So, as a punishment I also lost a lot of good driving weather.


Six weeks later, returning to the site

The evil road, revisited in Autumn

After having the experience I did reflect on it a lot, alternatively blaming myself and yet trying to find blame in the environment.

When I returned to the scene six weeks later, I couldn't really find evidence of that malevolent piece of road that threw me off. I couldn't really even find the exact crash site. Going backwards and forwards I couldn't see much wrong with the surface. To be honest the paths I had navigated in the morning of that day looked far more tricky.

All I can now say is that the path edges were perhaps a little vague. I may have already been sort of off-road when I noticed something is wrong. Or, there was some fairly minor anomaly in the road that could have been easily avoided had I not insisted on driving so near the edge.

Or I was just tired and did not pay attention to the path that looked easy compared to the other more narrow, twisting paths.

I have also thought I could have handled the situation better. But I maybe did the right thing after all, at least in braking first and letting the kickbike take its course, rather than trying to rapidly change the trajectory of a 100kg+ system in full speed. By not jumping off I might have avoided the fall, but it's hard to say what might have happened then.

I finally did get the helmet, though.


Tuesday, 19 July 2022

Handlebar mod

Although I have liked the wide handlebar, at 60cm it's perhaps just a little too wide.

For fun, I also measured the handlebars of various rentals. The measures are not accurate to the millimeter, I used a tape measure and it was not always simple to get an unobstructed measurement.

Voi  60cm
Lime 60cm*
Ryde 55cm
Tier 52cm
Dott 52cm
Bird 52cm

*) The handlebar is curved, I measured the straight line from end to end.

From top left, clockwise: Voi, Tier, Dott, Bird, Lime, Ryde

The comparison isn't very meaningful as I have only tried the Voi. But it looks though the 52cm is more common. 

Interesting though that Voi should increase the width. Last year's Voi rental kickbike had 56cm width (I measured it).... but, strangely enough, this year's model appears to have 60cm wide handlebar.

If there's any new observation to be made here, it's that the handlebars are always somewhat ahead of the stem, which is not the case in the Zeeclo.

The 52cm is likely impossible to achieve, and perhaps not even desirable. But I could comfortably take 4cm off, if possible, making it 56cm.

The major constraint here is collapsing the handlebar, as the two "pull-out" components need some space to move. The above shows the parts (red) extended, demonstrating how little room there are for the various parts on the handlebar.

Although the left side has generous 30mm free room, the right side is crowded. After considering this from a few angles with CAD and pencil sketches, I decided that if I take the display out (the green part) I can do the cut. 

The grips were again pulled out, and this was not as arduous task as last time.

There are plastic caps at the end of the metal pipes, after removing these I created a 20mm trace round the pipe using a vernier caliper and a paper knife.

Then it was just sawing off with the hacksaw. The blade was Sandflex BI-METAL 24TPI, which, judging from the diagram, should be fine for hollow pipes with some material thickness. (22mm pipe with 2.7mm walls here)

I was a little rusty with the saw, but the second cut was already quite fast. With a hacksaw, the angle of the saw is not necessarily the angle of the blade and the cut. I took care to create a good vertical cut from the beginning, so it would act as a guide for the rest of the sawing. 

I guess the ends ought to be covered with paint, but I might still cut off a little more.

Putting the rubber grips back, I noticed it can be useful to cover the "airhole" at the end of the grip with my palm. This creates an airbuffer or something that allows the grip sink in very rapidly and easily. This felt counterintuitive as I thought the hole is there precisely to allow air out.

For a few days the display was simply left dangling around the wires.

Test Drive

I felt this change improved the handling of the kickbike. I could take the tighter turning arcs more comfortably, and it is even possible the handlebar is less shaky.

The height of the stem was accidentally changed too, so I can't attribute everything to just this one change. Looking at past photographs, it's not that different though.

Wait, there's more!

There's the issue of the loose speedometer/computer. The local shops had a surprisingly few handlebar extenders. GoPro camera owners are well catered, but there's scarcely anything else. I couldn't see good parts in the hardware store, so this time I abandoned the DIY angle.

eBay to the rescue. After browsing a while I could find a shop in Ireland that sells these handlebar extension racks in 10cm and 20cm varieties:


The 22mm pipe is extremely flimsy, but it doesn't add much weight either. The clamp is 8.5mm wide, which is rather good.

Below is one of my first attempts. Good sense says the display might be better near the center, or at the right side, but I couldn't resist putting it here among the other controls.

The clamp is in an unorthodox place, around the moving bolt. However at this point I don't have the 1cm space in the handlebar!

As I mentioned this could be fixed by having shorter rubber grips.

These grips are 13cm, but can be easily cut into 11cm without breaking the appearance. These grips didn't feel that great to the skin, but I can at least use them to test the idea.

The grips were not as easy to push in. Halfway through I gave up, and then I couldn't get it out!

Fortunately the material is so rubbery I can roll it inside out. This also gave me an idea of how to install the grips, should I want to use these.

But I will save these thoughts for another time.

Thursday, 30 June 2022

Summer update


After having the eletric kickbike for more than six months, I have barely 150km in the odometer. During the hot and dry summer days this might change.

I still occasionally use the voi rental scooters, because it is sometimes just handier to not stress about the parking. Although, with the attention now given to mis-parking, it can be slightly stressful too. Also as the number of rentals in Helsinki is growing (voi, lime, tier, dott, bird) I'm somehow happier not having to think about them.

But the voi handlebar is really stable compared to my "zeeclo". In fact it is one of my on-going gripes with this model, it is somewhat shaky and needs to be aligned with the wheel from time to time. I mean, how difficult it would have been to design so it wouldn't rotate at all?


I bought a modest lock that should prevent the simplest thieving actions. 

But I haven't decided what would be the best solution here. Collapsing the kickbike perhaps draws less attention to the vehicle and could discourage people from fooling with the controls. However, in this state it could be carried rather easily away after cutting the lock.

Apart from the lock, I have bought an electronic pump to adjust the wheel pressures. This I will discuss separately at some later time. 

Let's just say I avoided the weird generic instructions at the Zeeclo website which suggested the wheels could be set at 50-60PSI. It might not be applicable to the Zeeclo Fenix at all. I instead followed the value of 35PSI found on the wheels itself. The vehicle is marginally faster when there's more pressure in the wheels.

I would have taken it to the workplace earlier, but the elevator was fixed only recently. It barely fit into the small space of the elevator! Mind you, the distance to work is so small I barely need the scooter for my commute.

I have kept quite accurate record of my travels. Without making it too obvious where my homebase is, I combined the extents of my journeys into a single image, courtesy of Google Earth and the handy "path" function.

The map doesn't mean I have driven extensively in the city centre. On the contrary, I have mostly avoided the central areas, instead favouring dedicated bike routes even in cases where they make the trip longer.

The supposed 20km range (10 there and 10 back) gives some limits to these trips but I have not really even used this range yet. 


Sunday, 27 March 2022

Zeeclo will tear us apart

(...or the other way round really, but anyway)

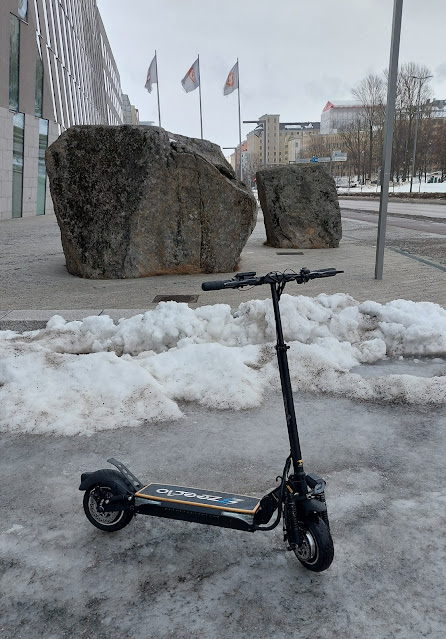
The weather is favorable for some scooting again, even if doesn't look like that from the photo.

But I modded the electric kickbike a little, it's missing a piece in the above image.

I already previously wrote about my intention to remove the wooden deck and replace the grip tape.

This is partly because I felt there's 0.8cm of extra height to an already high deck, and secondly I didn't like it aesthetically.

So here are some notes of this project. After ordering suitable grip tapes (2 just in case!) I could start working.

Removing parts

The old grip tape came off quite easily from the corners. Then I removed the bolts with 4M Allen/hex key.

But because the deck wouldn't come off I removed the entire grip tape in case there might be more bolts. This was also very easy to do, so replacing just the tape would have been quite simple.

As a side note it can be seen the surface can get rather dirty easily.

Because I couldn't find any more bolts I deduced the wooden deck has been glued in after all.

I begun pulling out the deck, prying it up from the corners using a strong knife. Sadly I could not be patient enough and the deck was split in half from the middle. Well, it came off easily enough after that! 

It would have been better to pull it up from the ends rather than from the corners.

Yet I'm not too disturbed as it has been my intention never to re-attach the wooden deck anyway.

Well, what was then revealed is the real surface of the chassis, metal painted black. The remaining glue needed to be removed, which was the bigger chore here. The excess glue here has a filmic and paper-like quality, and wouldn't budge easily.

I began removing it carefully with a sharp blade, and although this was doable, it turned out to be far too slow. Kicking the glue around with the edge of a wooden block proved to be more useful.

The small amounts of remaining glue could then be removed using acetone, wiping the melting gunk out with a piece of cloth. I really had to lather the surface constantly with acetone to make this work.

Removing the glue altogether took more than an hour.

Now that I'm looking at the results, I think the wooden deck wasn't there for nothing.

Firstly it is meant to cover all the bolts from moisture and rain, not just the ones used for the deck but the protruding ones at the front and back. It obviously protects the metal surface too.

Secondly the piece also extends the length of the usable deck with a few centimeters, because the bolts are no longer in the way.

Thirdly I guess it gives a nice and even surface for the grip tape.

Interestingly, there are more bolts here at the front than in the comparable T4 (Maxwheel etc.) and the Zeeclo U322 itself, which doesn't have the wooden deck to begin with.

The not-to-scale image above shows some of the parts involved here. The structures holding the front and the real wheel are welded into this inner chassis structure. Here the "inner chassis" has been imagined as somewhat pulled out from the outer case.

I became curious about the metal cover. It appears that the "wings" are also part of the cover and not removable plastic additions such as the lights at each corner.

I had a notion that the cover and the wings could be removed, but now I realised the metal case is a kind of outer "pipe" to which the inner structure is apparently slid into.

It might be interesting to try to dismantle the whole thing, if it's even possible. As it appears it is not all welded shut, it ought to be doable.

However, as I understand it, removing the outer case would result in something that doesn't stay in shape, so I'm not too keen to do that now.


Attaching the tape

The surface isn't exactly even, as there are two inclinations, possibly for the grip tape strips that are seen in other scooters. For the grip alone this might be enough here, but I had to take into account protecting the metal surface in the middle. Sand particles under my boots would easily scrape the surface.

I measured the free area and cut a precise 490x129mm piece of the tape.

With a skateboard, you'd position the tape over the deck, process and cut the remainder. Here the piece was smaller, and positioning it exactly was the hardest part. After that there isn't anything to it, just patted it some.

For now I took the lazy option and did not fill the additional bolt holes (the ones holding the wooden deck in place) but simply covered them with the grip tape. I can see myself doing this better at some later time.

For example this piece does not prevent the rest of the surface from getting damaged, like the wooden deck would have done. Later, the piece might be roughly shaped like a plus sign. But the main point here is to test the grip quality.

All in all, although I understand the protective idea of the wooden deck, this looks better to me and does not seem to compromise grip quality. And it is 8mm lower!

I drove about 10km and didn't feel there was anything wrong with it, my feet fit on the deck just as well as before really. The unprotected parts did become somewhat dirty though, the paint surface will probably be scratched through eventually.

Sunday, 13 February 2022

Ice and sleet


There was a short window of time with dry roads, before new snow. So I took the opportunity and rode the Fenix outside.

Wind and wetness worried me more than the temperature (+2°C) and the occasional crunchy patch of icy snow.


With the lobster-like skiing(?) gloves I didn't feel any cold in my fingers. I've driven in a -6 weather with these, and the cold does eventually get through after 15-20 minutes. 

I felt the ice and packed-snow areas are driveable, but they also have thickness and hitting the snow sheets in a wrong angle could result in a wobble.


Wednesday, 1 December 2021

Zeeclo Fenix inside


As it gets somewhat trickier to drive this in the sub-zero temperatures and icy paths, it is perhaps the moment to take the Zeeclo Fenix to the garage. 

What is inside the box?


The scoot has been folded and placed upside down on top of two chairs, so the folded stem fits between them.

The bottom panel was easy to remove, there are 14 hex/Allen screws.

The inside is a curved-corner container with the battery pack, controller boxes and a huge spaghetti of cables.

Not shown is the inside of the removed panel, which also holds two more of those foam rubber bricks. It is yet unclear if there is something else than glued foam rubber holding those elements in place, because otherwise everything is simply lying on that bottom panel.

The front end after the cables is empty space, no more boxes there.

Among the spaghetti there's the grey cable loop that I understand is the speed limiter, forcing the 25km/h maximum speed. In Finland, this makes the electronic kickbike equal to a bicycle in the eyes of the law.

I've read some differing information about the true maximum speed, which might be 35 or 40km/h.


The battery pack

The battery pack certainly takes the most space. While it looks that a slightly larger pack would fit inside, I'm not sure if it would be worth the trouble. The vehicle is heavy as it is.


The amount of typos here do not really build my confidence about the quality assurances and certifications, but this alone isn't a reason to think the battery would be fake.

The ~20x10x7cm blue box contains the battery pack with this information:

Li-ion Power Battery Pack
Model: CHY3713E041090
Nominal voltage: 37VDC
Charging Voltage: 42V DC
Rated capacity: 13Ah/481Wh
Cell:18650 [=18x65mm type]
ISO9001/Authentication enterprise [=quality management standard]
Manufacturer: DongGuan CHY BATTERY TECHNOLOGY CO.,LTD
IEC62133 [=certification]
UN38.3 MSDS [=certification]

Googling the "model" or a fragment of that code did not give meaningful results. Should I need a replacement, it might be not as simple to find as I thought. The DongGuan site did not have the exact model either.

18650 means the pack uses the 18x65mm cells, commonly used in electric bike and car battery packs. A 6x11 matrix of these could theoretically fit into this pack, but after peering through with a small flashlight it looks there are 5x10 cells.

Some high-level math suggests that 10 x 3.6V cells need to be in series to get at 36V. I'm thinking each odd column is upside-down in relation to each even column, as I've seen photos of comparable products do that. But this is something I couldn't see directly.

I didn't take the battery pack out now, but it shouldn't be hard to guesstimate how much the ~20x10x7cm pack could weigh:

There's a website that talks of fake 18650 batteries: https://www.instructables.com/How-to-know-a-fake-18650-battery/

They claim that a fake 18650 battery weighs less than 42g, as little as 32g. Real cels weigh 45 or even 50 grams.

So, 

50 * 32 =1,6kg ("fake")
50 * 42 =2,1kg ("fake")
50 * 45 =2,25kg
50 * 50 =2,5kg

If the battery pack weighs less than 2kg total there might be reason to worry, but even if it weighed more it's no guarantee of best possible quality.

This also shows that the battery makes for less than 10% of the scoot's weight (27kg).
 

The controllers

There are two controller boxes on top of each other, and I'm now just assuming they are similar, possibly because there are two motors. At least they have the same cables coming out of them. However it looks it says "dual motor" on one, so why wasn't one enough?


Although the brakes are physical disc brakes, the levers need to override the motors, so the levers also work as a kind of clutch. This is likely the reason why the controller needs to address brakes too.

I had to tear away some of the foam rubber to see the full text, typos and all:

DC Brushless motor Contoller
Voltage: 36V
Current: 21A
Brakes: Low level
Speet set1. 1-3. 7VDUAL MOTOR
TF-S866-ABS-ELECTRON
YKJY06F0C01-A-H-T4

Again the codes were not that useful for finding an exact make, but the "S866" at least is a clue this plays together with the S866 display. Looking at webstores the S866 is often sold with a similar-looking controller box.

The code might actually be YKYJ06F0C01 and not "YKJY..." but that doesn't give many results either.

There are so many typos in the texts I'm unsure if the information is correct in the first place.


The indicator lights

While at it, I looked at the deck sides and pulled out one of the indicator light plastic housings. 


This was again simple to do and revealed it should be easy to remove these decorative elements.


Now if the deck and all these were removed I'd get a nice-looking black box, but I'd also have to take care of all the openings so that water and dirt don't get in. There's some black gunk that both keeps the wires in place and prevents water from getting in.

The wooden deck

I also took the opportunity to check the wooden deck and how it might be removed. 

I was afraid the deck might just be brutally glued in, but this isn't the case. Feeling around the "sandpaper" with my fingers, I discovered spots where it gave in, just a little, indicating there are bolts underneath.


The surface is probably skateboard grip tape. Pulling one corner out, the bolt could be seen, but I didn't pull it out more as this ruins the look of the surface. Perhaps after I get a replacement grip tape I can experiment more.

The deck looks like some bamboo variety, this might weigh 500 grams or even less, not very significant. The plastic decorative parts also weigh almost next to nothing.

Removing the wooden part could make the deck 8mm lower. But I'll still have to see if the wooden piece is there for a good reason or not.