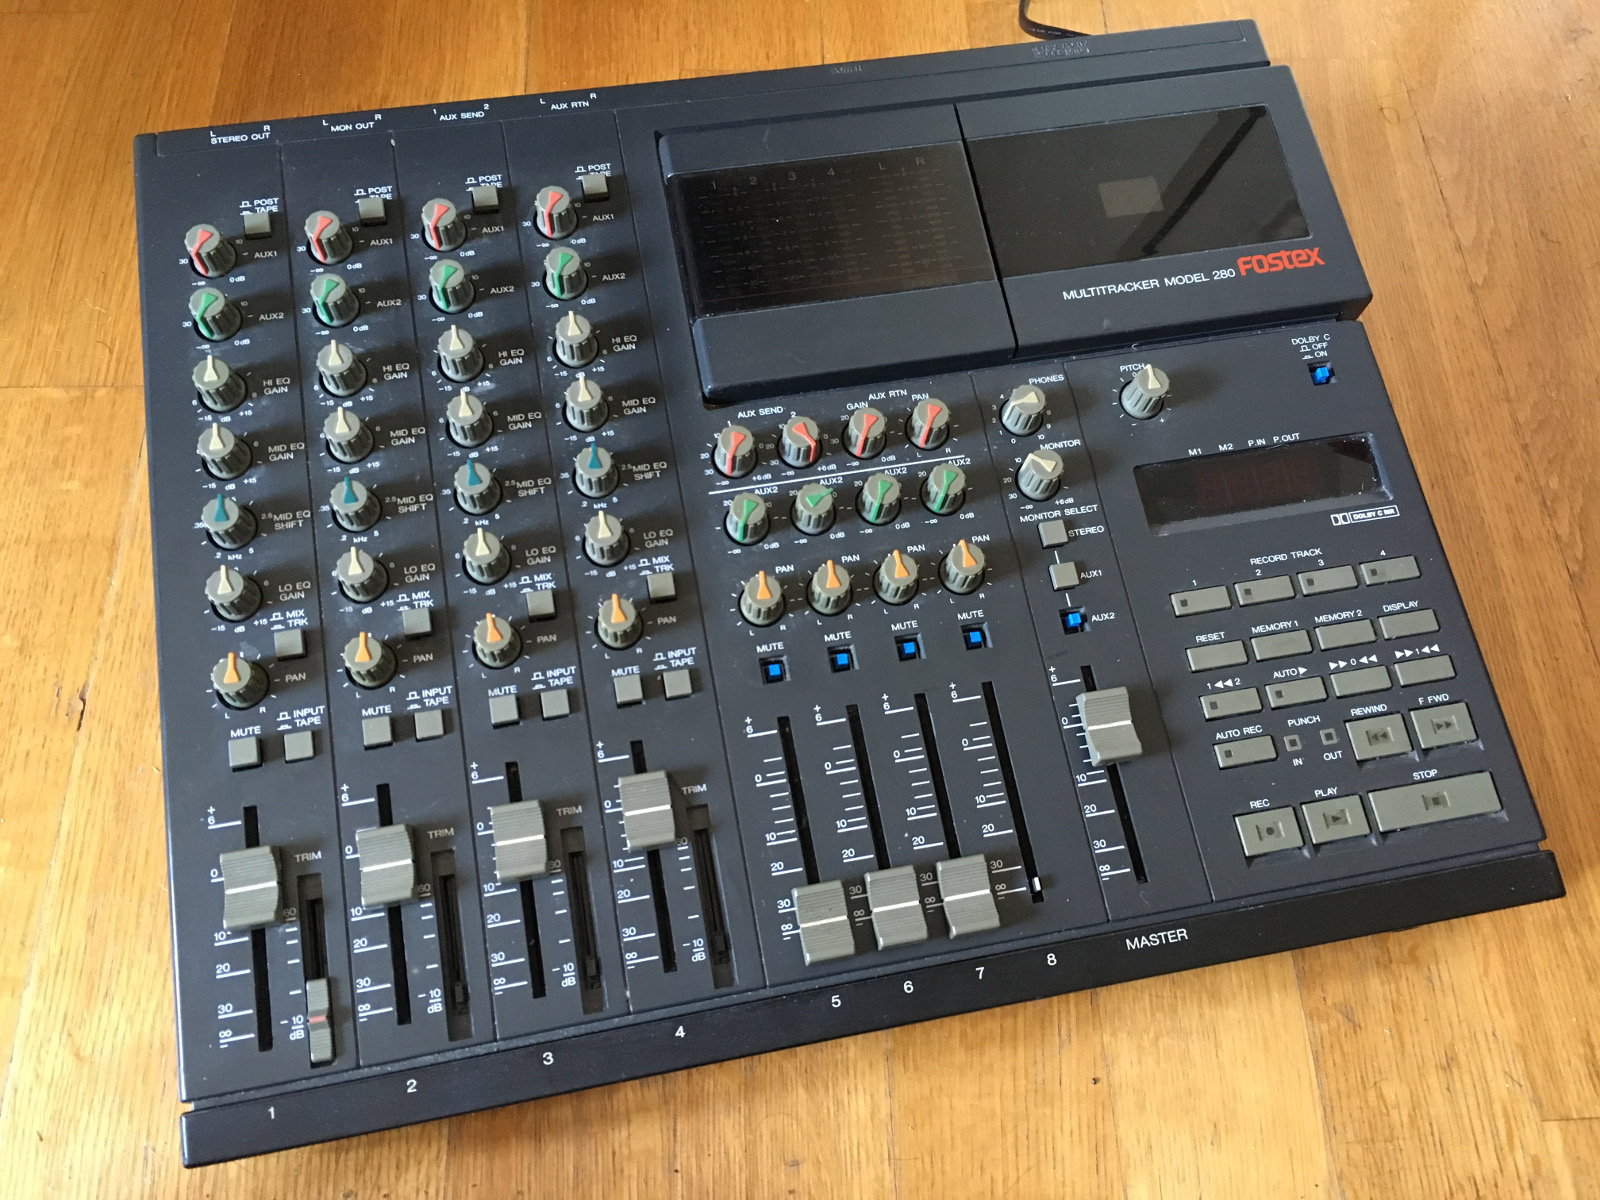
I have had a Fostex 280 (1989) 4-track tape recorder/mixer for about 20 years. I bought it used, around 1998, did some funny stuff with it but then generally forgot about it. At some point I considered it a junk item as the tape recorder had ceased working.
Now I found a 4-track tape with something I'd not heard in 20 years, which gave a motive to look at the device again. Searching the net I was pretty sure the tape recorder belt was faulty, which was also easy to confirm.
Also, I had probably misused the multitracker back in the day, so it might be interesting to record something with a bit better understanding of sound dynamics and a more appropriate cassette type.
The Fostex does 4-track on a C-sized cassette, simply creating four magnetic trails instead of two, using a higher speed than ordinary tapes. The mixer part has 4 main channels with equalization, gain, two AUX buses and various re-routing options. There are also 4 more channels with less options, giving a total of 8.
Channels can be recorded on one track, or stereo-recorded over two tracks at once. Tracks can also be bounced, re-recording for example three tracks onto one, giving more space for new tracks.
The digital control over the 4-tracker is pretty neat, as the tape counter can be set to zero at a convenient point, and then >>0<< rewinds the tape back to that position. There's also one alternate memorized position that can be used as a loop end position, facilitating loop and auto-record.
Looking at eBay listings, a working Fostex 280, although not super-expensive, is not exactly trash either. Going back the memory lane, I remembered how fun and uncomplicated it was to do a recording without a computer.
Replacing the belt
As I saw the multitracker was not completely lost, becoming motivated again, I then ordered a replacement belt from eBay and received it in two days. Day later, I had it replaced.
When the belt has disintegrated, the tape deck can't really behave at all. As the Fostex is switched on, it will give a horrible creaking sound and an "E" on the display. Furthermore, the tape head may be left awkwardly in a position that makes it difficult to remove or insert the casing cover or even a cassette.
 |
| The dreaded "Red E of Death" |
This video by the Youtuber account "3rd island" shows absolutely everything about the process. Without it I might have wasted time or even broken things. I'll recap the main points below:
- Remove all faders, unscrew the case cover and then gently pull out the cover.
- Disconnect cable connectors that might hinder the cover. There's no point in trying to keep the different units connected during repair, if they are in your way. The connectors are quite well color-coded and have logical sizes, but just to be sure you might want to photograph the starting position.
- Pull out the circuit board with the faders. There's a foil between this and the circuit board below. The foil does not need to be fully removed, just disconnect all the connectors that lead to the tape unit, and make some note of their routes between the capacitors.
 |
| The white, red, blue and yellow are for the tape unit. |
- Remove the four screws that keep the tape unit in place. Take note of the ground wire that is also screwed in. Pull out the tape unit.
- A metal panel needs to be removed before the belt can be inserted. This part is held to the unit with only one mechanical screw. Take care with removing the screw as this holds a couple of other parts in too, mainly the spring. Also, take at least a mental note of how the spring is held in place, before loosening any parts.
- Now the belt can be positioned around the metal wheel. The other end may be stretched around the small black plastic protrusion next to the plastic wheel, which is the real target for the wheel. Also, make sure the plastic wheel and the metal wheel are clean.
 |
| The belt is temporarily stretched over the black plastic stick. |
- Putting the tape unit back together, make sure the spring is in correct position. After the screw is in, the belt can be moved from the temporary position to the actual wheel. As shown in the video, tweezers are good for moving the belt.
- The ends of the spring need to be re-located, use a combination of a small screwdriver and tweezers to achieve this.
 |
| Left: The hook for the top side of the spring end (not in place). Right: bottom spring end hook (in place) |
- Put it all back together, don't forget the grounded wire under one of the four screws and don't forget any of the connectors.
What makes this fairly simple is that the insides of the Fostex are quite modular and the tape unit is easy to remove.
As I went through the process I soldered back one of the headphone sockets which had come loose. To tell the truth there's a lot of other problems with this multitracker, such as a bit lazy/random rewinding and fast forwarding. Some of the channels have ceased working properly.
I'm wondering if some of these might relate to bad capacitors or similar issues. So, the recording experiments may have to wait for a while. But at least I got my sound out from the 4-track tapes which was enough for now.
can i order any type of belt to replace?
ReplyDeleteI have the same problem with it, but: heads do NOT go up and down repeatedly, but stay up there and cannot get convinced, even with slightly trying to press the heads down to get them down again. so, they stay up, no matter what is done (power on…off) and the top therefore cannot be taken off to repair that. what to do? I do not want to break anything… (there is also a cassette stuck in that thing; the deck does not answer to any further actions, power on or off)
ReplyDeleteHi there. I just had the same issue. Did you manage to get the head down again?
Deletesame issue here, did you manage get the cassette out?
DeleteReally old comment I know but perhaps helpful for someone else. I've had both issues: tapehead carriage goes up and down and tape stuck in with tape head carriage in the up position after a belt replacement. Cycling the power switch on and of at different speeds is the way to go to get the tape head carriage low enough to retrieve the cassette so you're able to open the device up. I then got an error message after powering on. Take out the cassette transport, flip it over, lift up the lever of the solenoid (right bottom side), then rotate the metal fly wheel clock wise (which starts rotating the large white gear) until the large white plastic gear stops rotating. The spring tensioned plastic hook has then passed one of the nubs on large white gear, there are multiple so you might have to repeat the process to set the gear right for a clean start up. I then left it playing cassettes for an hour since it wasn't used for years. Good luck!
DeleteSo I had this issue, replaced the belt, and all is well. The heads were stuck in the up position however. What did I do? Well if you flip the unit it over and take out all the screws and turn it back around right side up you have enough maneuverability that, with some patience, you can move the top piece around and move it around the tape heads.
ReplyDeleteIf you are unlucky enough, like me, to get a tape stuck in there as well, I hope you're using the type of tape thats held together with screws because you're going to have to disassemble the actual tape to free it.
Hi, i too had the problem with a tape stuck in the 280, i found a effective and non destructive way of solving the problem.
ReplyDeleteTurn of the 280, under the heads there's a black plastic, just insert pliers or anything that fits, and push the plastic to the bottom, it won't move, that's normal, then without stopping pushing turn on the 280, it should push the heads back in place without damaging anything.
Someone knows the size of the belt, exactly?
ReplyDeleteI just replaced the belt in my fostex 280 and turned it on got an error message. Maybe I did not connect the ground in the right place. Can anyone tell me where the ground wire should be connected?
ReplyDelete